
GATEの使い方 2 ~PETサンプルコードの実行~

How to use GATE 2

今回はいよいよGATEを触っていきますよ
This time, I’m going to use the GATE.
GATEはSPECTとPETに使えるようですが、本記事はPETを構築します。SPECTはまた今度。
It looks like we can simulate SPECT and PET device using GATE, but this article concentrate on the PET. I’ll write about to simulate SPECT using GATE in the future.
これを読めばGATEの操作~サンプルコードの実行まで理解することができます!
You can understand operation of the GATE and how to run the sample code.
GATEの使い方 2
How to use the GATE
Keyboardの設定変更
Changing of the keyboard layouts
では前回、GATEがインストールされた仮想マシンを起動するところまで終わったので、今回はそこから始めます。しかし、やることが残っていました。
We have already finished preparing the virtual machine and run it, so I start from here. However, there is something left to prepare.
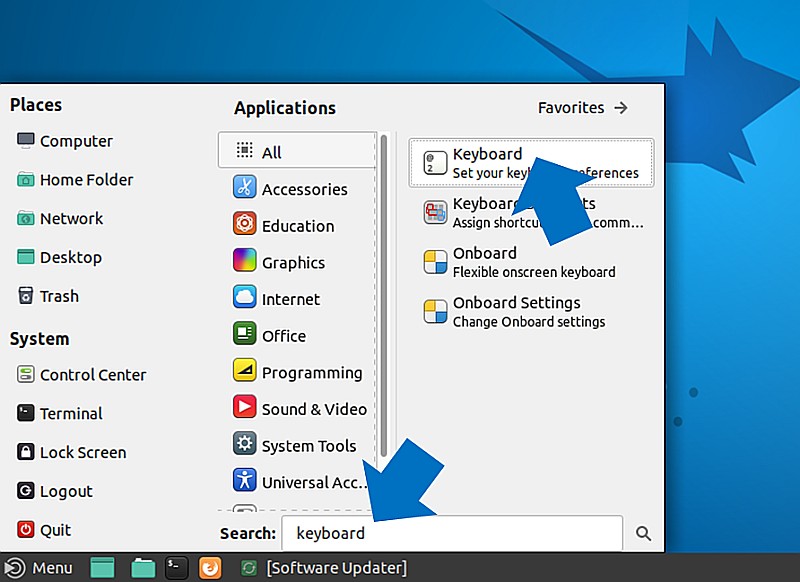
キーボードの設定が日本用になっていませんので、それを変更します。スタートメニューから検索で「keyboard」と入力すると見つかりますので、それをクリックしてください。
You need change the setting of the keyboard because the keyboard layout is not Japanese. You can find the “keyboard” by using search window in start menu. Please click it.
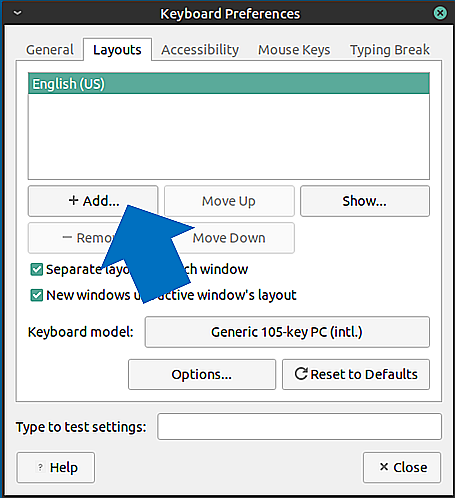
「Layouts」タブの「+Add」を押します
Click the “+Add” button in “Layouts” tab.
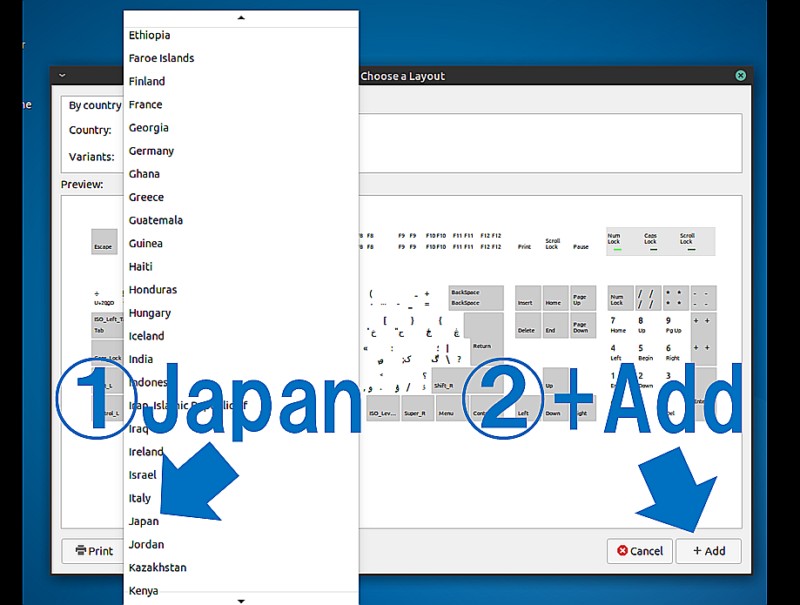
Japanを選んで追加(Add)します
Select “Japan” and click “+Add” button.
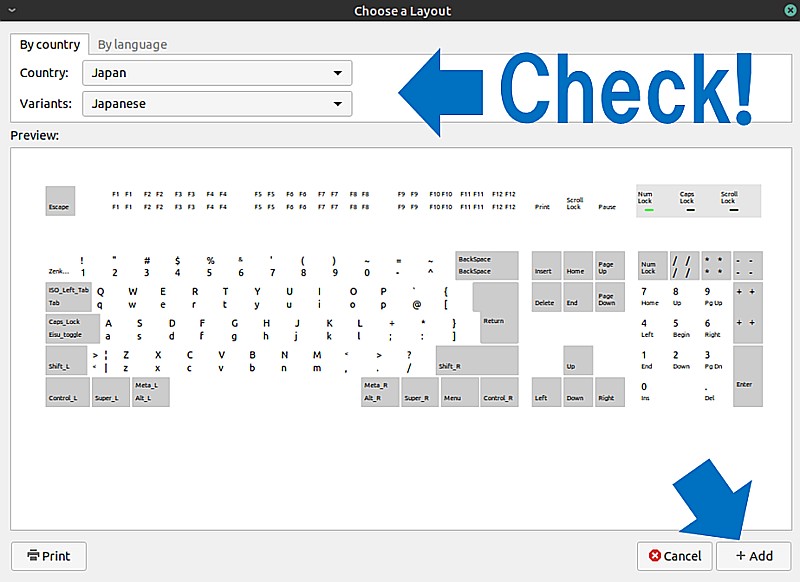
「Japan」に変わっていることを確認して「+Add」
Please confirm that Country is Japan and Variants is Japanese, and click “+Add” button.
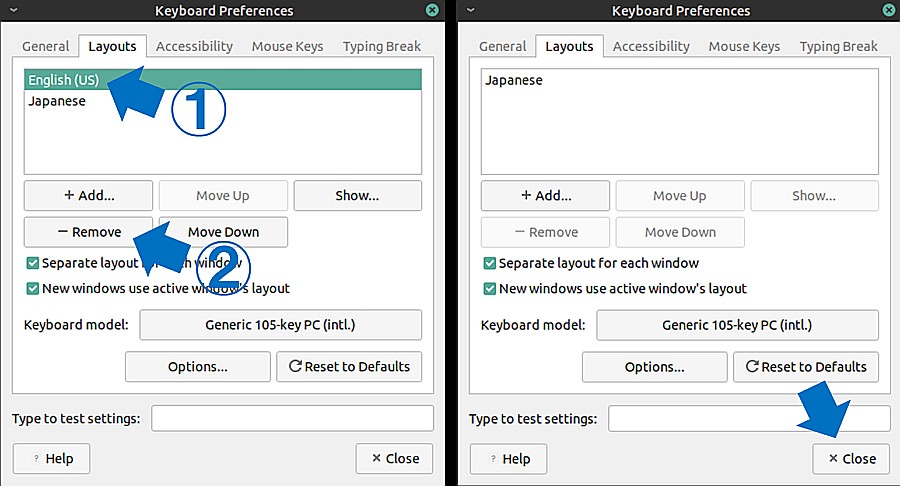
英語は必要ないので削除しておきます。
English layout is not necessary, so remove it.
英数字と記号 _ ( )^ ~ * ? などが入力できることを確認してくださいね。
Please confirm that you can input the alphanumeric characters and every symbols (such as _ ( ) ^ ~ * ?).
準備が終わりました。GATEのサンプルコードの実行をします。
Preparing is done. Let’s run the sample code of the GATE.

ターミナルを起動します。画面左下の黒い四角をクリックします。するとデスクトップ上にターミナルが現れます。
右クリック→Open in TerminalでもOKです。
Start the terminal.Click the black square in the lower left corner of the screen.The terminal will then appear on the desktop.
Or you can run the terminal by “Right-click→Open in Terminal”

sudo apt update と入力してEnterを押してください。
Enter the command “sudo apt update”, and press the Enter key.

すると、パスワードを入力するように求められます。それを入力します。パスワードは画面には表示されません。
仮想マシンのパスワードは「virtual」であることを覚えていますか?
Then you are required to enter the password. Then, you input it. Note that password is not presented on the screen even if you input it.
Password of the vGATE is “virtual”, remember it ?

余談ですが、便利なので「nautilus」をインストールします。sudo apt install nautilusと入力してEnterを押してください。
By the way, we install the “nautilus”, because it is useful. Please enter the command “sudo apt install nautilus” and press the enter.

「y」か「yes」を入力します。
Enter “y” or “yes”.

インストールが終わったら、試してみましょう。
You can try it when it has installed.
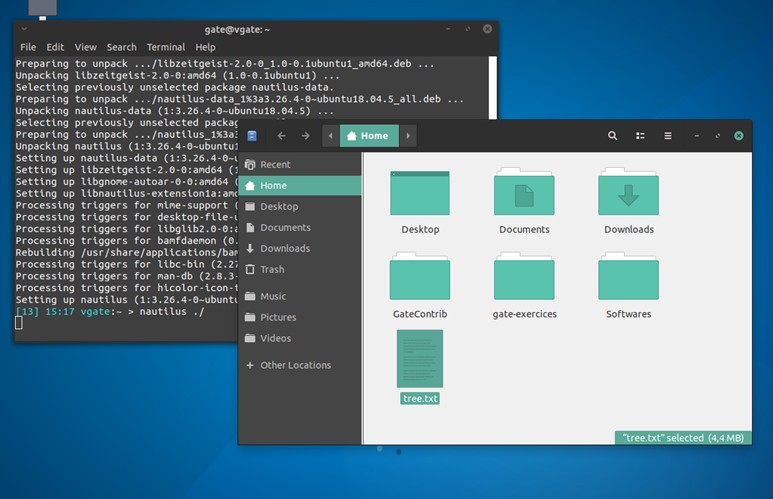
そうすると、現在の作業フォルダのウィンドウが立ち上がります。たまに使いたくなるので、インストールしました。
Then, the window which shows the contents in the working folder is appear. We want to use GUI (graphical user interface) sometimes. So I installed it.
GATEのファイル構造
Configuration of the GATE file
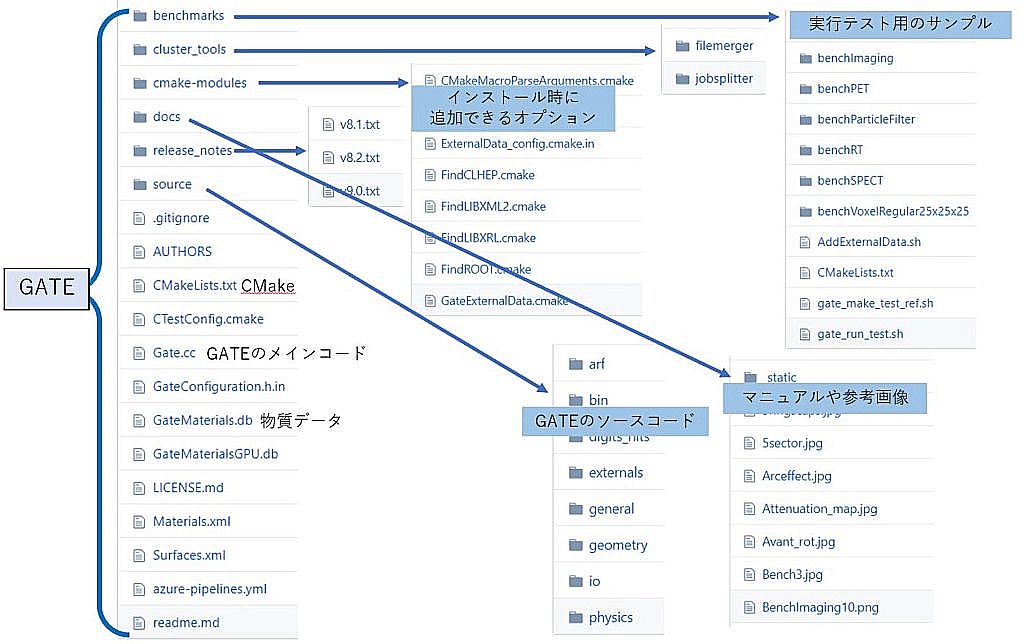
GATEのファイルはgithubで公開されています。ここだ!
You can show all file about GATE from Here !!

pwd (present working directory) コマンドを打つと、今いる場所がわかります。今は/home/gateにいます。
もし違う場所にいる場合は”cd ~”と打つと/home/gateに移動します。
ls (list segments)コマンドを打つと、今いるフォルダ(ディレクトリ)の中身を知ることができます。フォルダやファイルによって色分けがされますが、上の画像ではフォルダしかないため全て青色で表示されています。
You can know the place if you input the “pwd” command. Now I am in “/home/gate”.
If you are in other place, please enter the “cd ~” command. You go to “/home/gate” directory.
You can enter the ls (list segments) command to see the contents of the folder (directory) you are in. It is color-coded according to folders and files, but in the above image it is all blue because there is only a folder.
GateContribフォルダの中に入ります。
上のリンクにGateContribって無かったですね。GateContribの構成はここにあります。
Let’s get in the GateContrib folder.
There was no GateConrib in the link above. The GateConrib configuration can be found on here.

cd (change directory)コマンドでGateContribフォルダ(ディレクトリ)の中に移動します。また、lsコマンドで中身を確認します。
You can enter the GateContrib folder(directory) by “cd” command and check the contents of the folder by “ls” command.
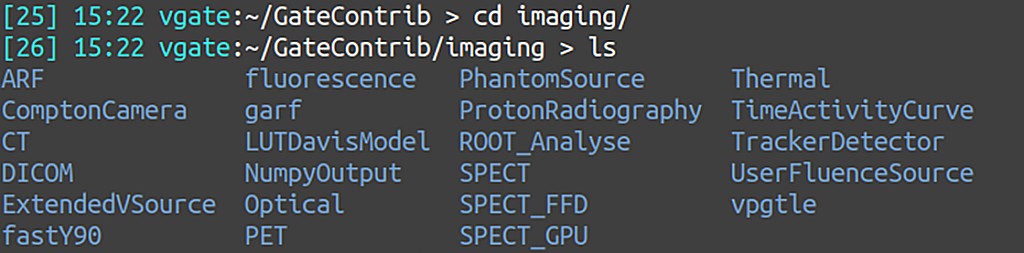
cdコマンドでimagingフォルダに入ります。lsコマンドで中身を確認。
You go to inside of the imaging folder by “cd” command, and enter the “ls” command.

PETフォルダの中にはいくつかのマクロファイル(XXXXX.mac)があることがわかります。
There are several macro file (XXXXX.mac) in the PET folder.

では実行してみます。 「GATE XXXXX.mac」で実行します。
You try it. Please enter “Gate XXXXX.mac”

エラーがでました。マクロファイルの中に書かれている「/gate/output/ecat7/enable」というコマンドが使えないようです。
Error is printed. It seem that the “/gate/output/ecat7/enable” command written in macro file (PET_Ecat_System.mac) is not supported.

仕方がないので、編集しましょう。geditというテキストエディタを使います。
You need to edit it, so you enter the “gedit” command, it is text-editor.
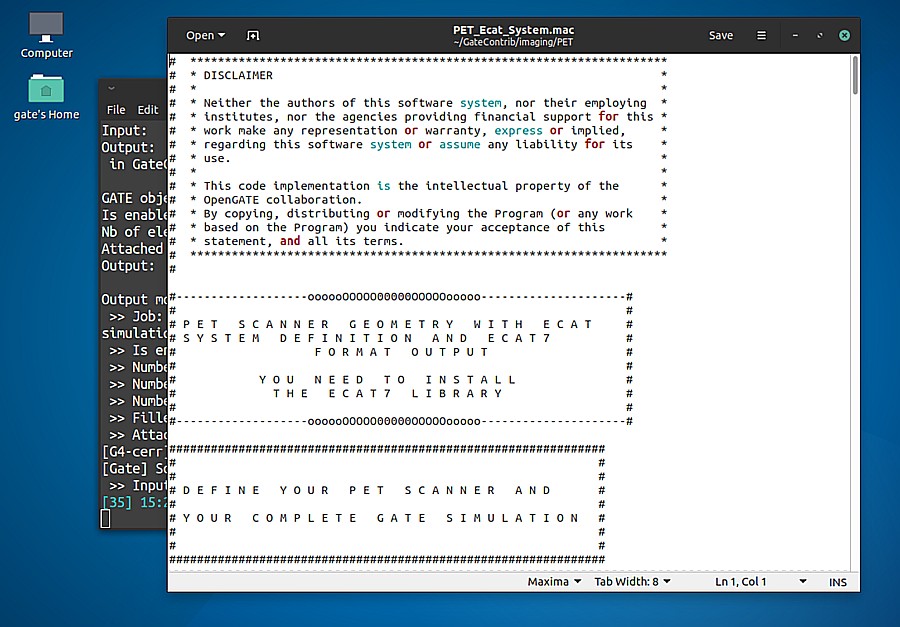
ウィンドウが立ち上がり、PET_Ecat_System.macの中身が表示されます。
Contents of the PET_Ecat_System.mac is displayed.
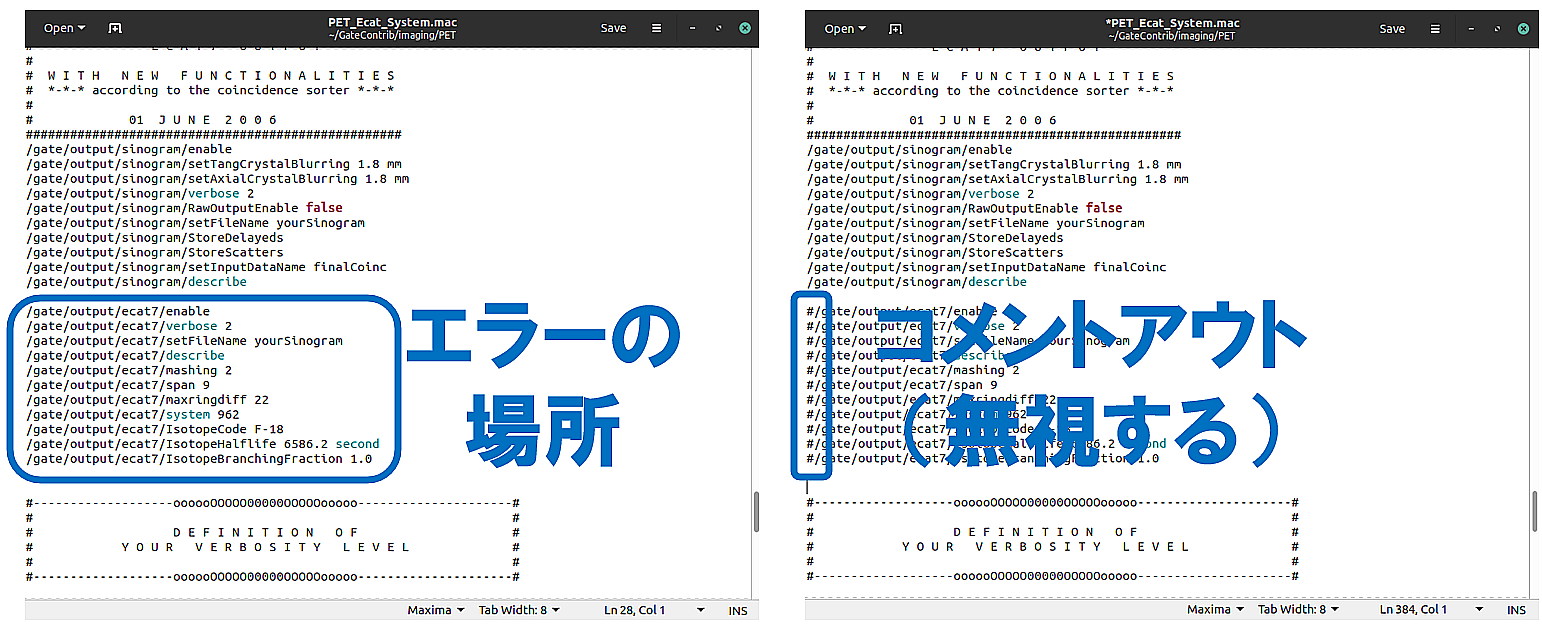
画像に示した範囲をコメントアウトします。
Please comment-out the area shown in the image.
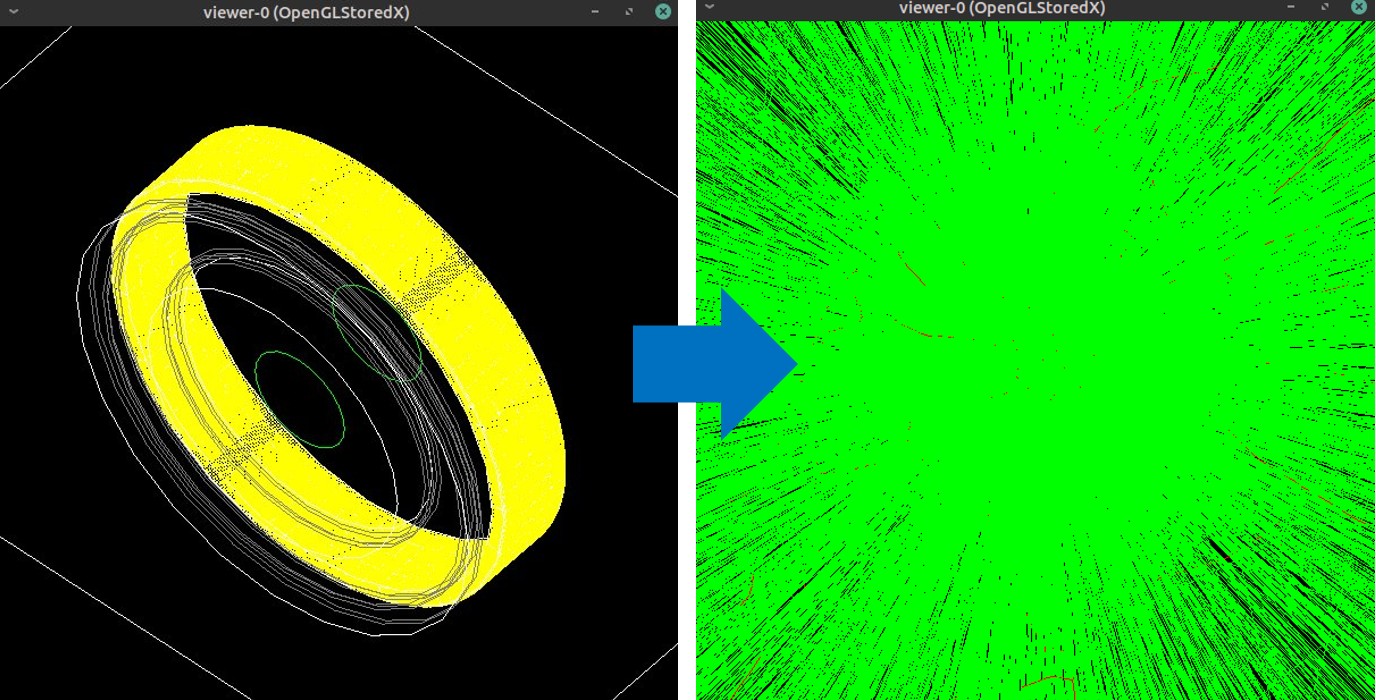
シミュレーションが実行されました。
Executed
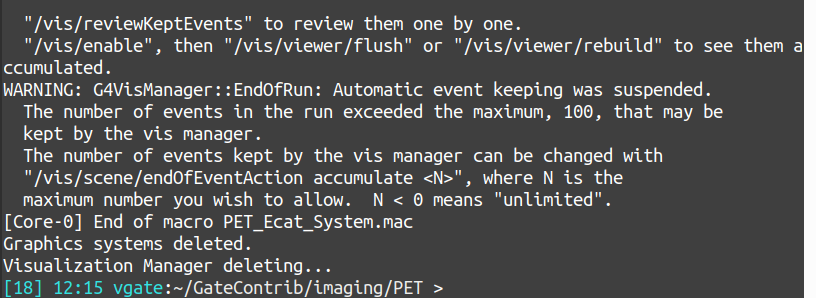
正常に終了しました。
Done normally.

結果として「YourPETSimu.root」が出力されました。
YourPETSimu.root file is generated as a result.
出力データの表示 Display of a output data

ROOTというソフトウェアがインストールされていますので、
「root YourPETSimu.root」というコマンドで開きます
“ROOT” software has already installed. You can open “YourPETSimu.root” file using root.
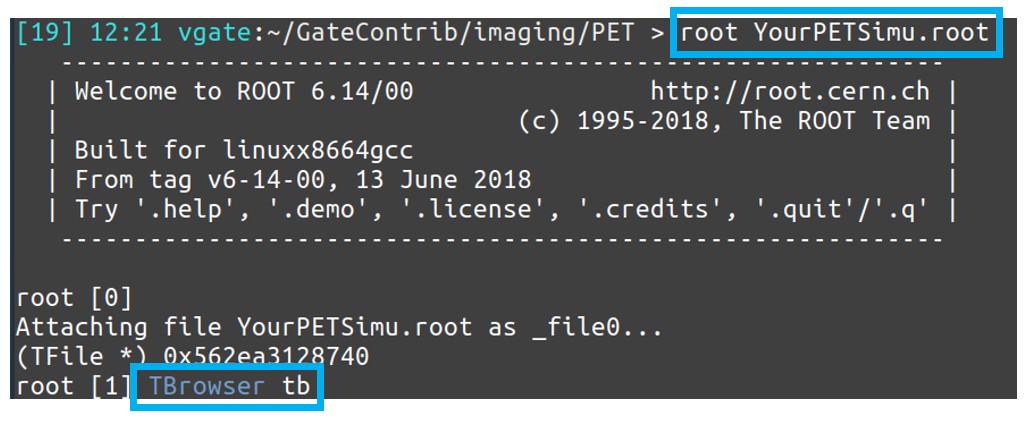
「TBrowser tb」と入力するとウィンドウが表示されます
Please enter “TBrowser tb”.
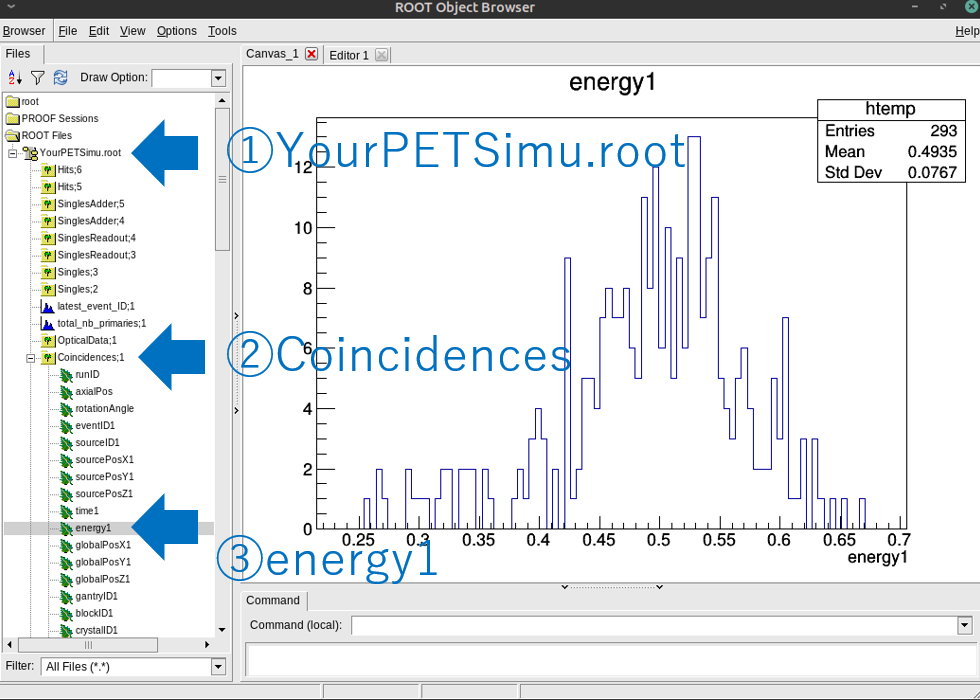
データは様々な情報を持って保存されており、上の図は同時計数した光子のエネルギー(MeV)を示しています。
Each data has a lot of information, above image show the energy of the gamma ray which is counted as a coincidence.
今回は以上です。次回はPET装置を自作する方法を説明します。
That’s all for today. I will explain how to construct PET device next time.