GATEの使い方 1 ~vGATEの環境構築~

How to use GATE 1

本記事ではGATEを使う環境の構築まで説明します。
You can understand how to construct the environment of the GATE if you read this article.
モンテカルロシミュレーションは放射線の挙動を模擬するのによく使われます。それは、放射線が確率に従った挙動をするからのようです。
Monte Carlo simulation is used to simulate the behavior of radiation because radiation behaves according to probability.
モンテカルロシミュレーションやってみたいなーという人もいるかと思います
Some people want to try out Monte Carlo simulation.
いろんな分野(レントゲン撮影、CT、核医学、環境放射線・・・)で使われていて、それぞれコードには向き不向きがあります。
Monte Carlo simulation code are used in a variety of fields, and each code can be used differently depending on the situation.
Such as radiograph, CT, nuclear medicine, environment radiation….
核医学分野ではSIMIND, Prominence Processor, GATE, SimPET, Geant4などがよく使われるようです。いっぱいありますね。
SIMIND, Prominence Processor, GATE, SimPET, Geant4 are used for simulation code in nuclear medicine field. Many !
日本放射線技術学会が出している「初学者のための核医学実験入門」にモンテカルロシミュレーションのコードが紹介されており、SIMINDについて細かく書かれています。(読んでみて!)
The book published by JSRT introduces some simulation code, especially SIMIND. Check here !!
本記事はGATEの使い方を紹介します。
This article introduce how to use the GATE.
SPECTとPETに使えるようですが、本記事はPETを構築します。SPECTはまた今度。
It looks like we can simulate SPECT and PET examination using GATE, but this article deals with the PET. I’ll write about to simulate SPECT using GATE in the future.

GATEの使い方 1
How to use the GATE
では本題のGATEの使い方について説明していきます。
Let’s talk about main theme (how to use the GATE)
初心者の方を想定していますので、初歩的なことを書いていきます。というか、私も初心者です。
I assume that the beginner read this article, so I write simply. I am also beginner.
Linux環境での作業になりますが、できる限り丁寧に書いていきますから、ぜひ最後まで読んでいってください。
Many people use Windows or MacOS, but we need to work on Linux OS to use the GATE. However, I try to explain as clearly as possible, so please read to the end.
Linuxのインストールから書いていると長くなるので、WindowsPCで仮想マシンを使ってやっていきます。インストール方法の説明もいつか書きたいなと思います。
It is need too much time if I explain about how to install Linux OS on your PC. So, I use virtual machine on Windows PC in this time. I will explain how to install Linux OS when I have enough time.
これを読めばGATEを動かす環境の構築までできます。
You can construct environment which can use GATE if you read this article.
1.GATEがインストールされた仮想マシンのダウンロード
Download the virtual machine which is installed the GATE in advance.
GATEの公式ページに行きます。ここだ!
Go to the GATE web site. Here !!
英語のページが開かれて、さっそく辞めようかなという感じがしますが堪えて先に進みます
GATE HP is written in English, so Japanese people do not like it.
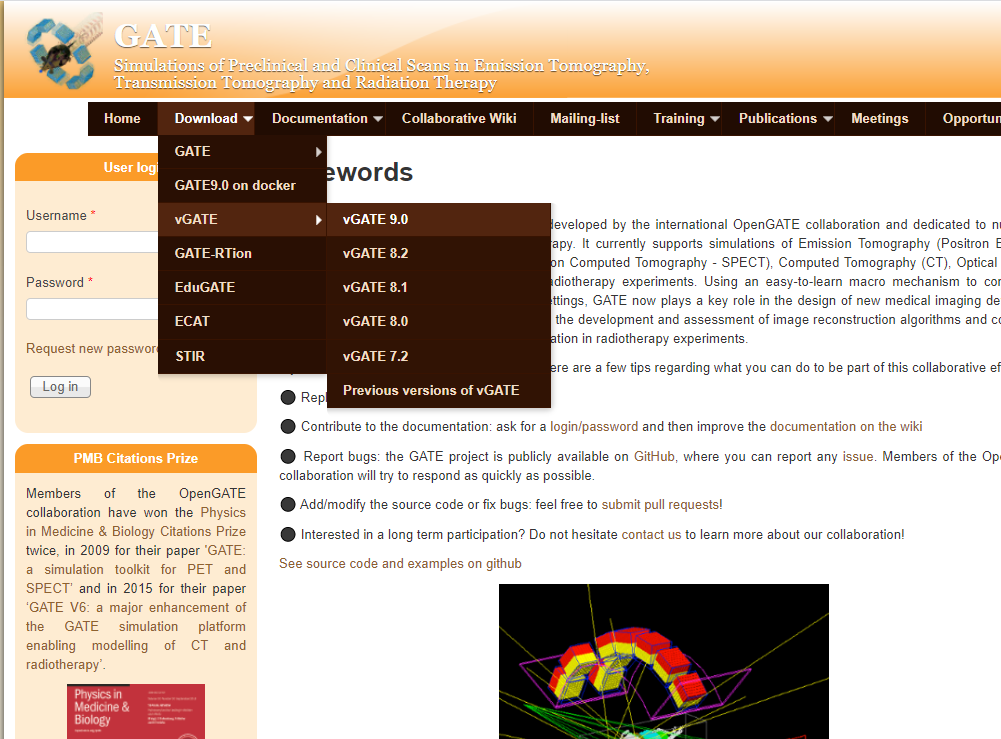
Download→vGATE→vGATE9.0という風に進みます。
Please go ahead. “Download→vGATE→vGATE9.0”
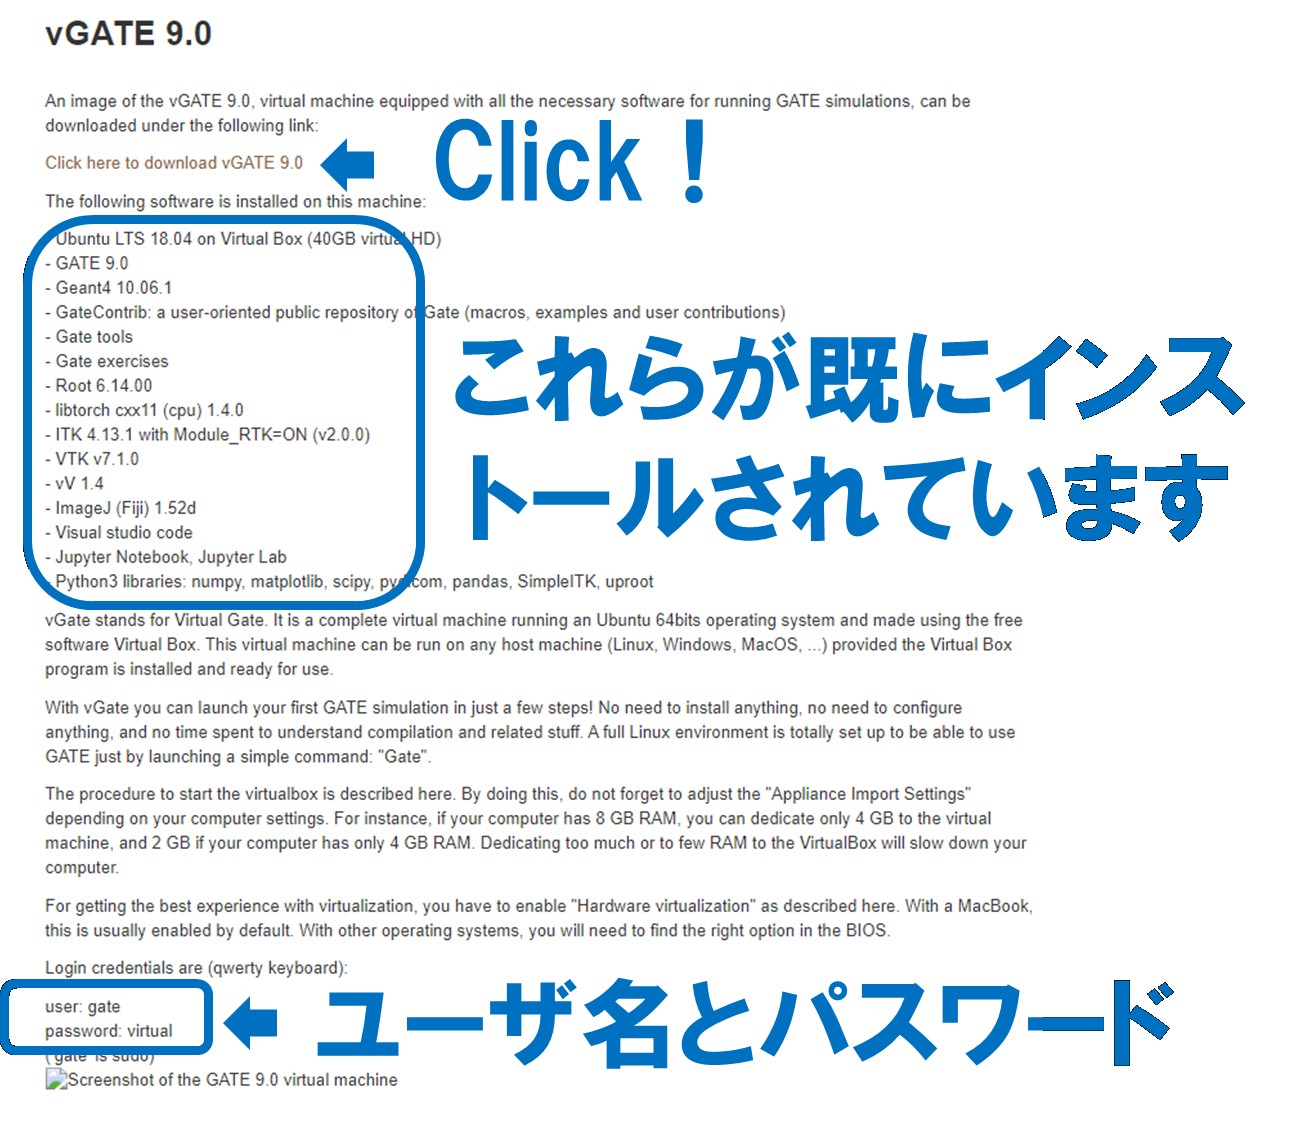
いろいろ表示されますが、「Click」というところからダウンロードしてください。ダウンロードされるのは仮想マシンのイメージディスクというものです。ユーザー名が「gate」でパスワードが「virtual」です。
You can download the virtual machine image disk from “Clike here to download vGATE 9.0” . Please remember that user name is “gate” and password is “virtual”.
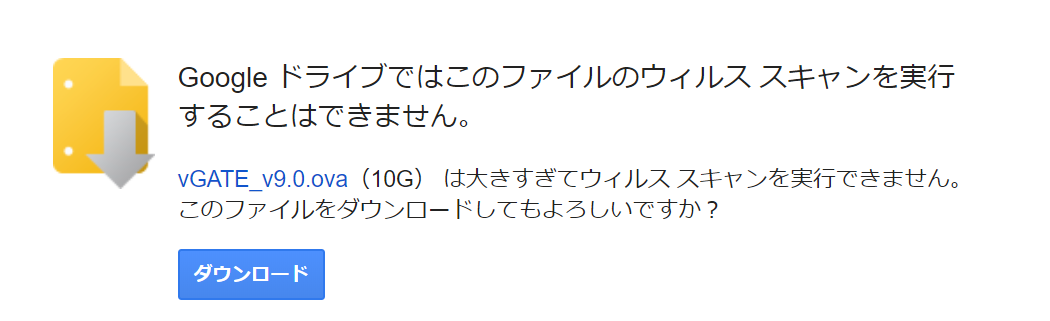
まさかの10GB!
Too large!
2.仮想マシンの設定
Setting of the virtual machine
ダウンロードしている間に、仮想マシンを動かすためのソフトウェアをインストールします。
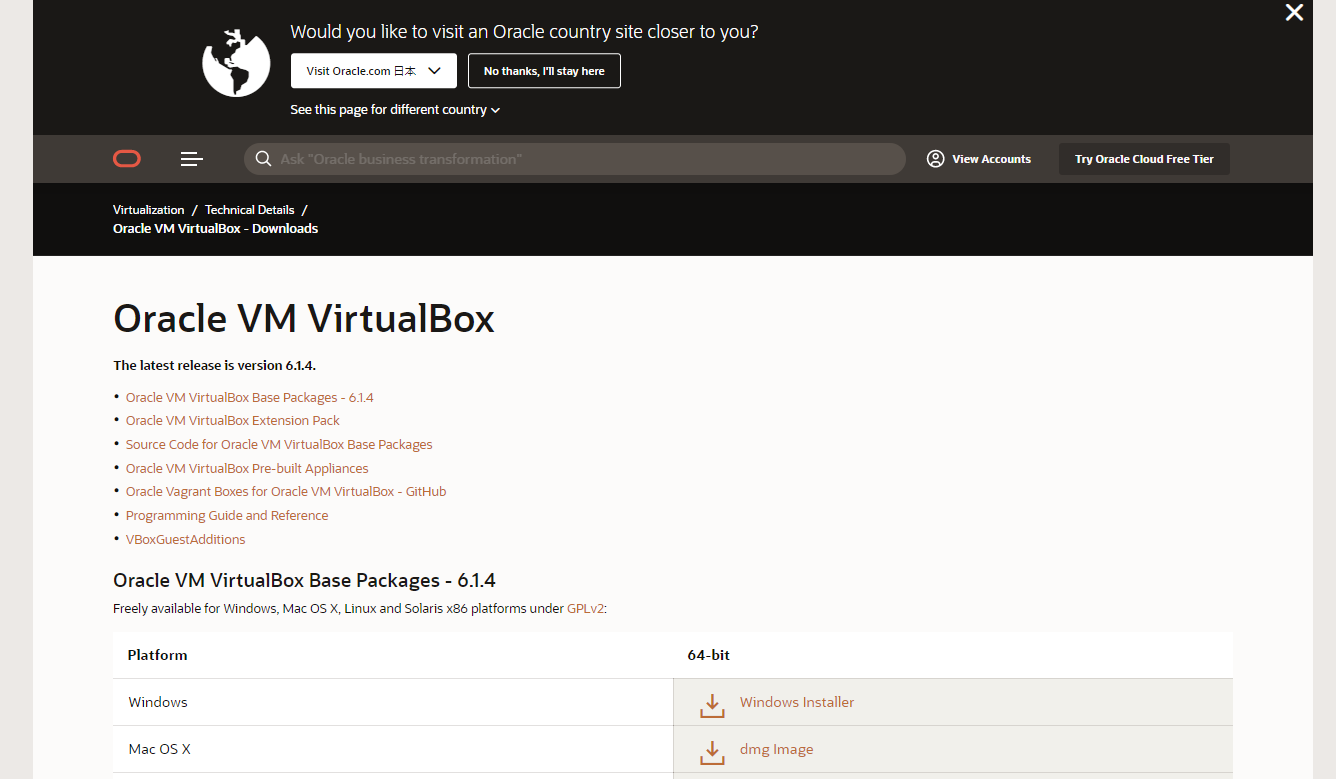
仮想マシンを動かすソフトはVMware, Virtual Box, Parallelsなどがありますが、今回はVirtual Boxをダウンロードしてインストールします。ここだ!
You should install the application which can work a virtual machine during downloading the GATE. There are several software, for example VMware, Virtual Box, Parallels and so on but I select the Virtual Box in this time. You can get it from here !
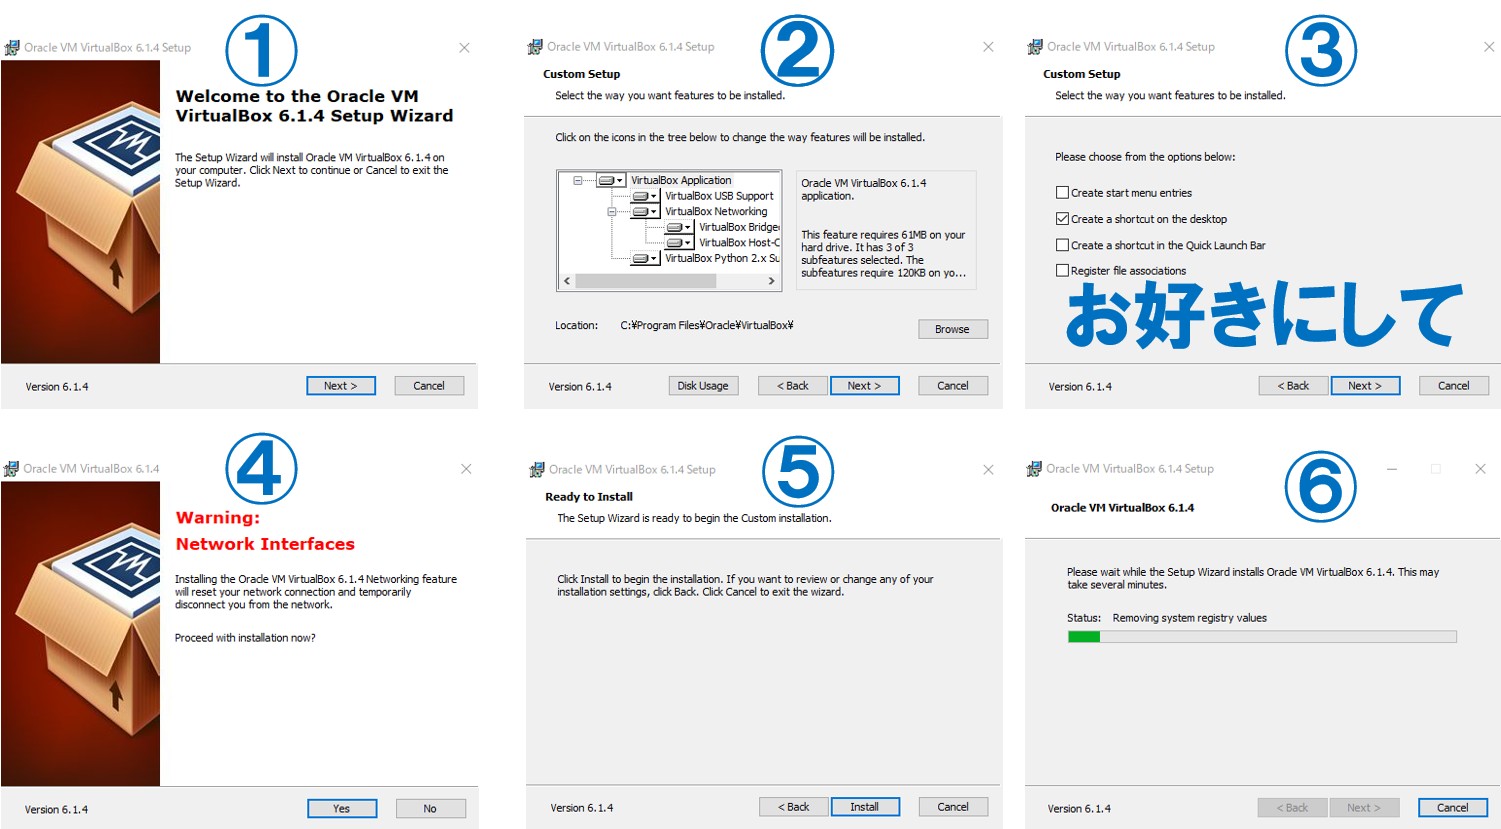
Next→Next→Next→・・・・・・・・・・・・・・・・・・・・
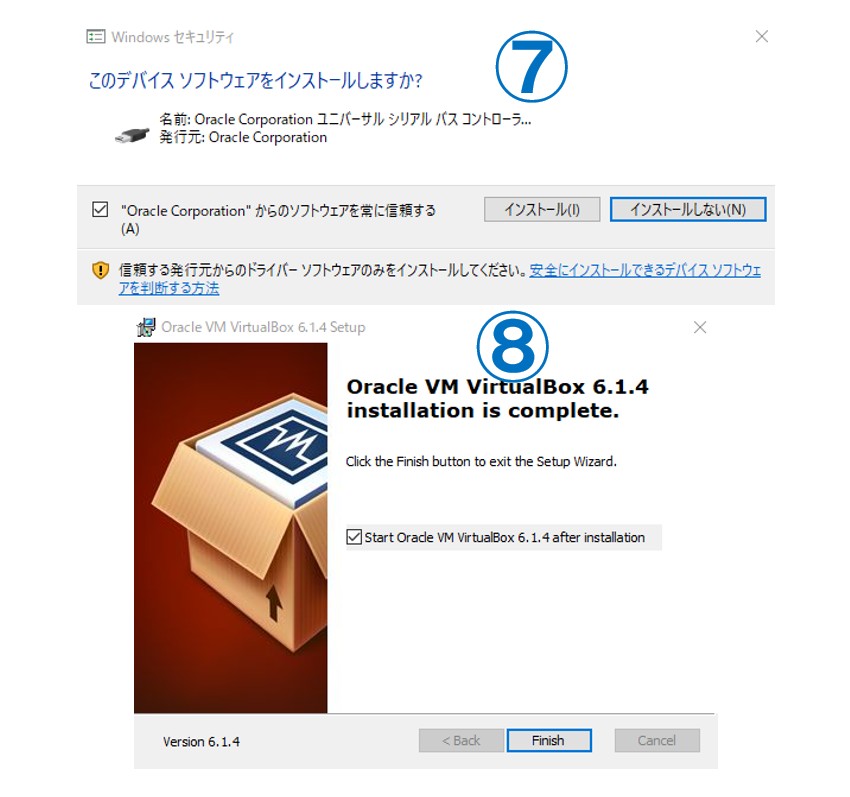
やっとインストールが終わり
Done

起動します。画像中に前のバージョンのGATEv8.2が既にあるけど気にしないでください。「新しいバージョンがあるよ」とウィンドウが表示されたらダウンロードしてもOK
Run the Virtual Box. GATEv8.2 is already installed because I use it. You may download/install new (version) one if this small windows is appear.
ダウンロード
Download
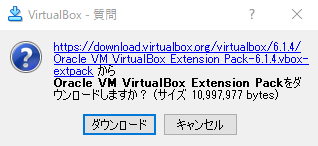
ついでに拡張機能パックもインストール
Install.
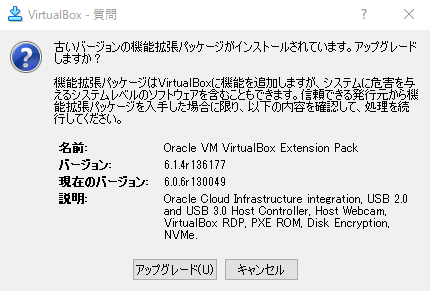
古いバージョンのVirtual Boxを入れてたからめんどくさい。
It’s a hassle because I installed old version.
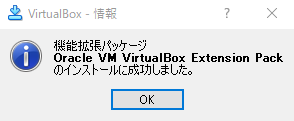
やっと終わった。
Done
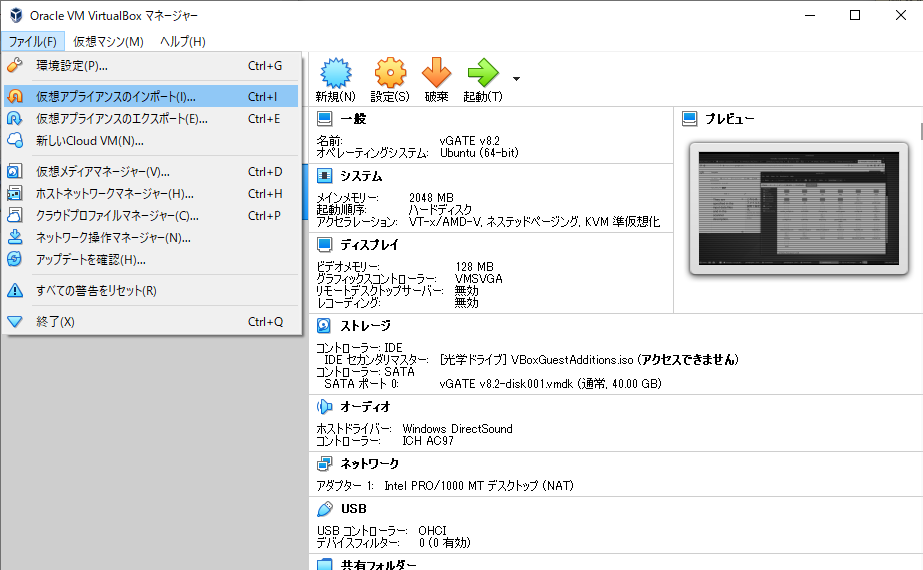
GATEのイメージディスクがダウンロードし終わっていることを確認したら、ファイル→仮想アプライアンスのインポート
You should confirm whether downloading the vGATE has already finished, and then you go ahead. “File→import of the virtual appliance”
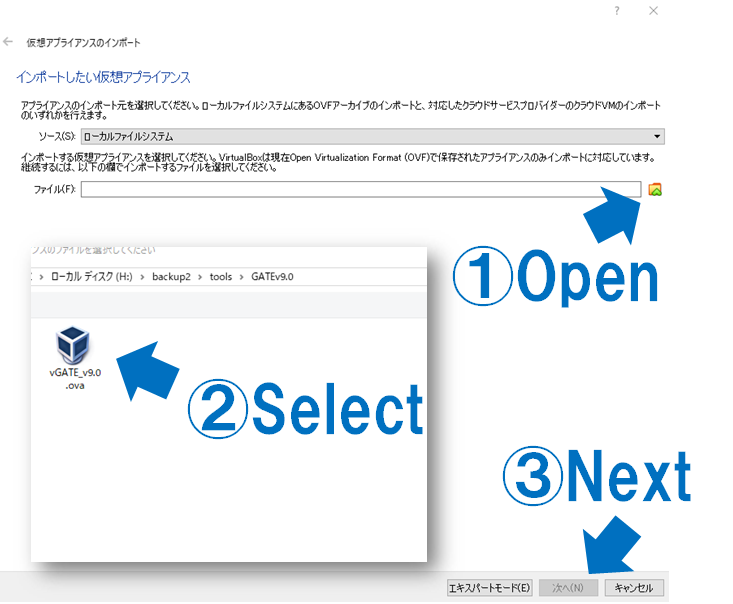
GATEのイメージディスクを選択して、次へ
Please select vGATE and go next.
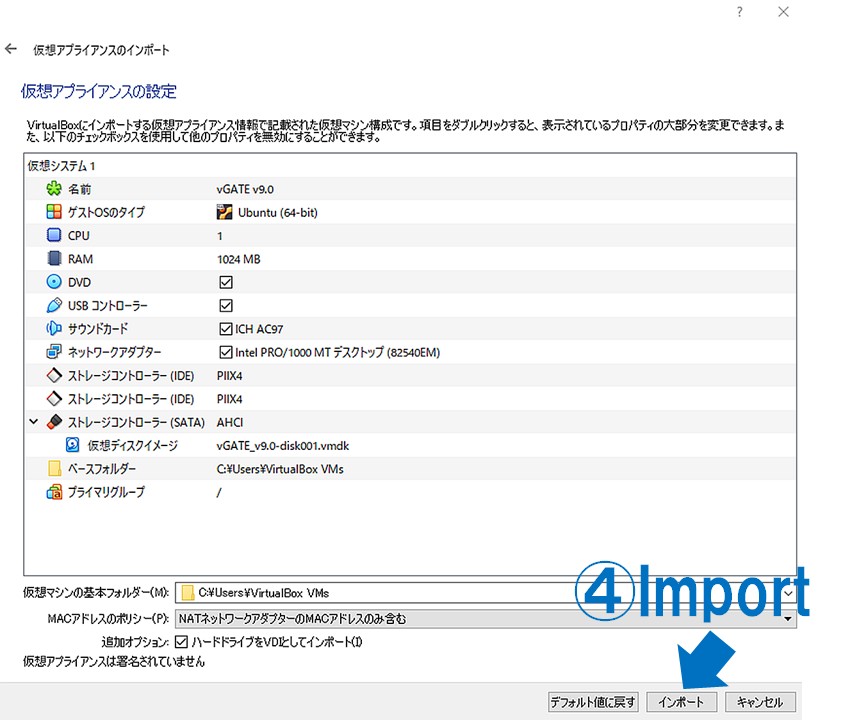
インポートする
Import
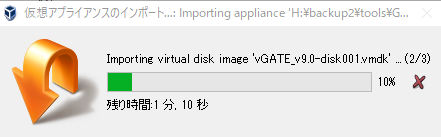
インポート中です・・・・
During the import.
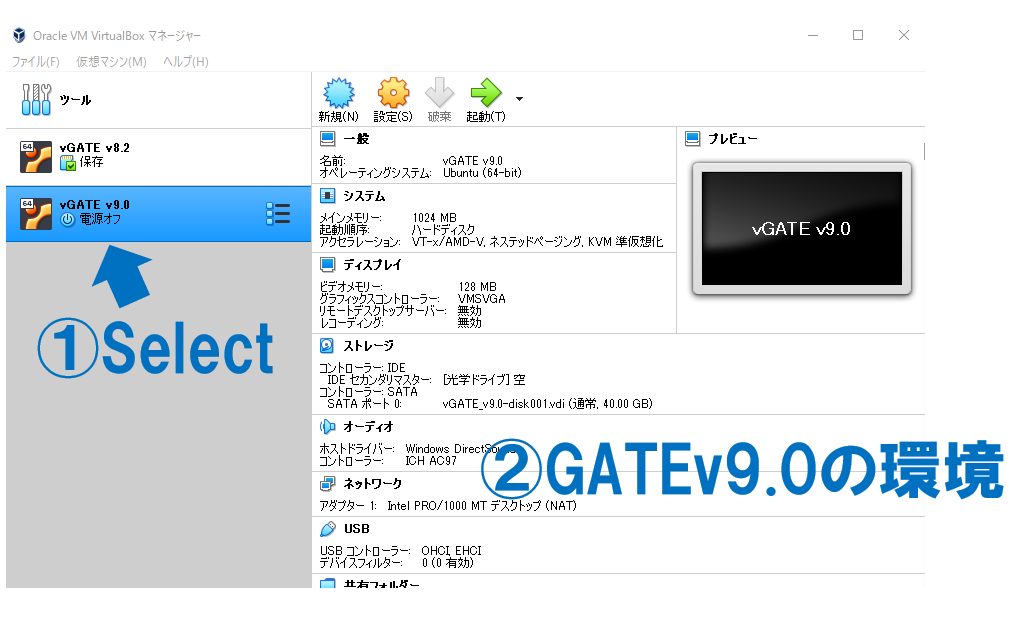
vGATEがインポートされました。選択するとそれの情報が右側に表示されます。
vGATE was imported correctly. The information of GATE is showed when you select it.
では次は設定に移ります
Next
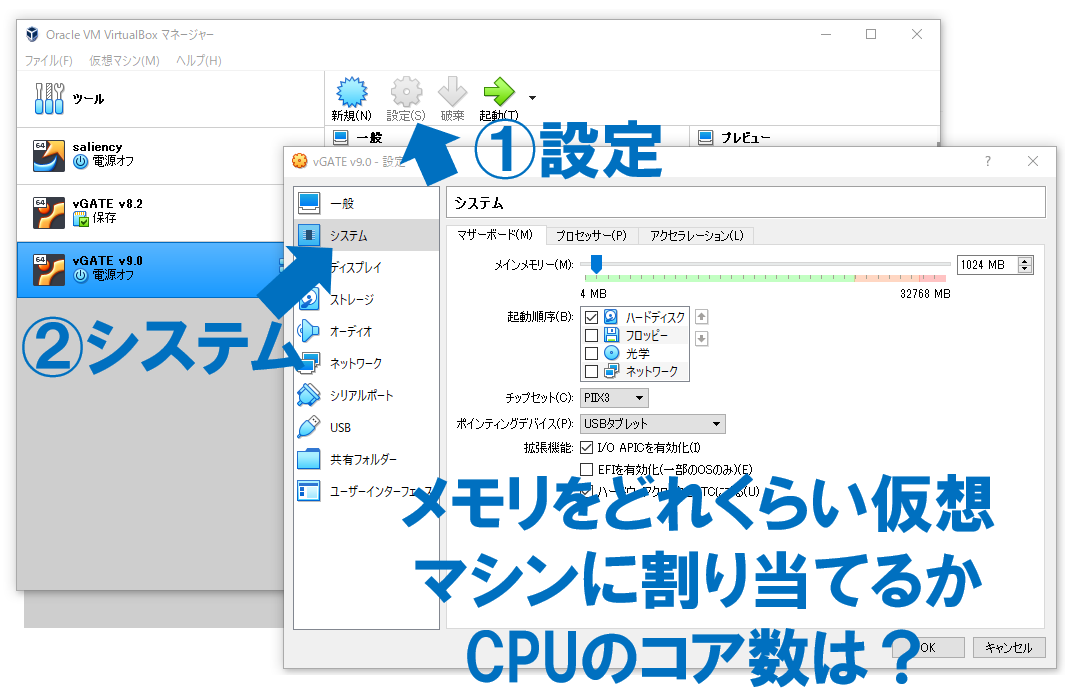
仮想マシンにどれだけのリソース(資源)を割り当てるかを決めます。割り当てすぎると、本物のPC(ホストPC)が重くなってしまうので注意!
とりあえず2GBくらい割り当てたらいいかな?
You can decide how many resources are allocated to the virtual machine. Host PC does not work well if you allocate almost resource to virtual machine (such as CPU core, Memory, …).
I allocated 2GB memory in this time.
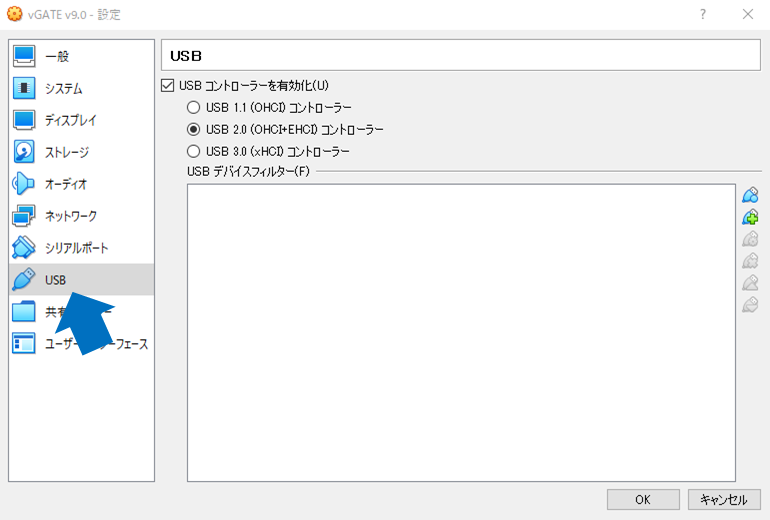
余談ですが、少し前に仮想マシンが起動しなくなることがありました。
USBの所をいろいろ変えたら起動できたので、もしそうなったらここを変えてみるといいかもしれません。偶然かもしれません。
By the way, my virtual PC did not work before. I could resolve it by changing setting of the USB. If you in such case, please try it.
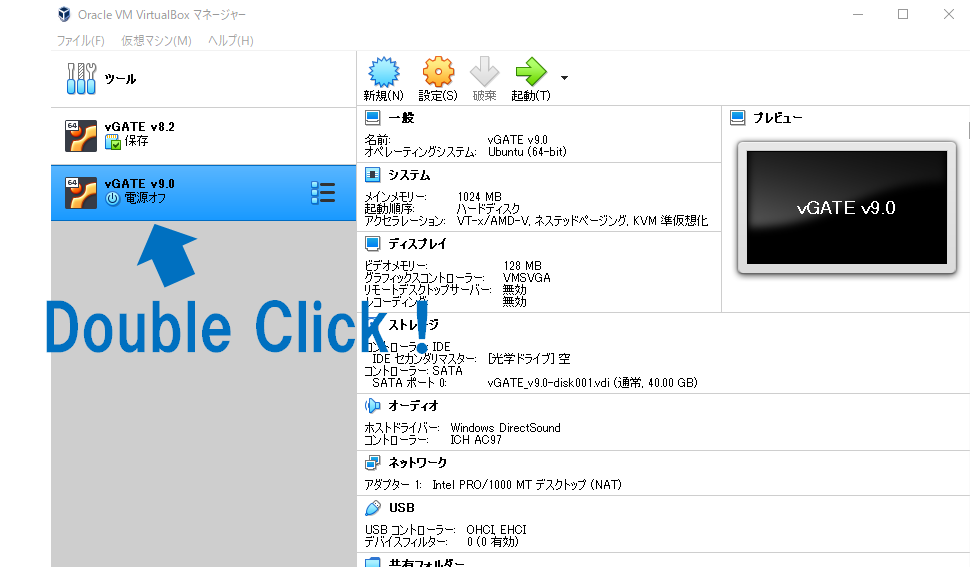
ダブルクリックして起動します
Double click to run.
そうすると・・・・
then
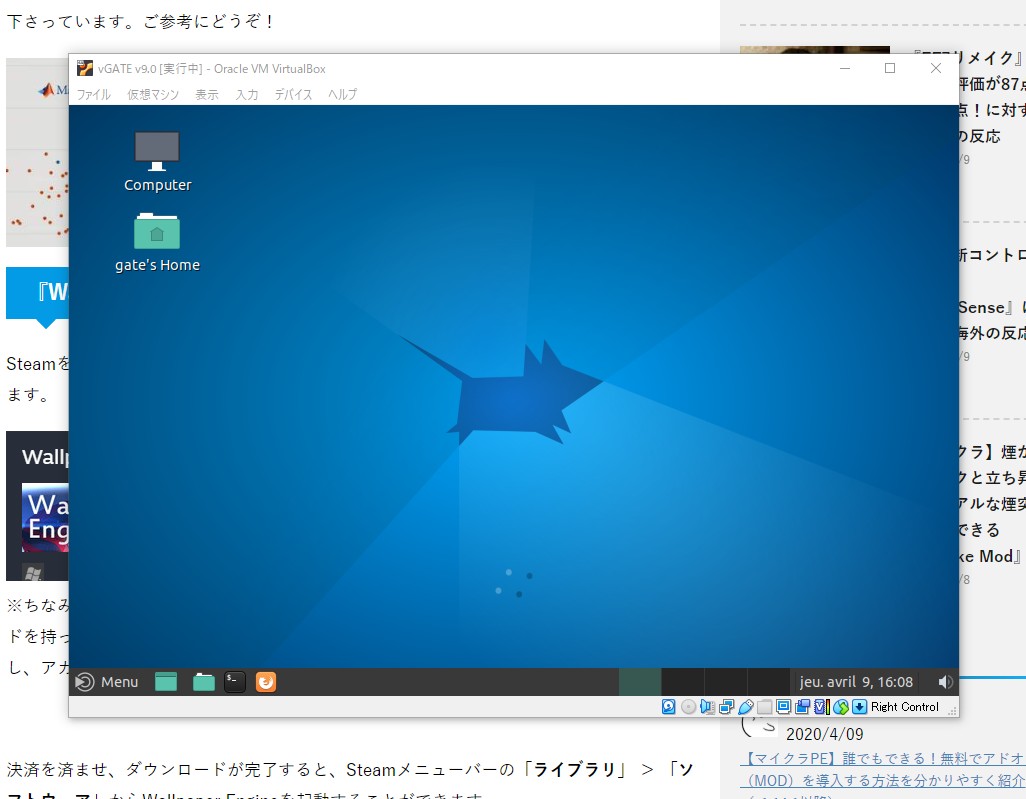
デスクトップ画面の中にもう一つのウィンドウが表示され仮想マシンが起動しました
Other window show in the desktop. Virtual machine is running.
やっとこれでGATEを動かす準備が終わりました
You can run the GATE from now.
次の記事から本当にGATEのことを説明していきます
I will explain about how to use the GATE in next article.
追記:キーボードの設定変更(英語→日本語)が必要でした。次回説明します。
PS: It is needed to change the layout of the keyboard (English→Japanese). If you use Japanese keyboard. I will explain about it in next article.