GATEの使い方 3 ~PET装置の構築~

How to use GATE 3

今回はPET装置を作ります
This time, I try to make the PET device.
前回はサンプルコードを実行しました。今回は自分で検出器の配列を決めてPET装置を作成します。
We executed the sample code of the GATE last time. We make the PET device by deciding the arrange of crystals and detectors this time.
これを読めばGATEによるPET装置の構築の流れが理解できます!
You can understand how to construct the PET device using the GATE if you read this article.
GATEの使い方 3
How to use the GATE
構築するPET装置の概要
Overview of PET device to be constructed
今回想定するPET装置はGE社のDiscovery MIです。特に理由はありません。ここに構成が書いてあったためです。
Discovery MI (GE) is modeled on PET device. There is no reason why I select it. I found the article which mention about it.
これによると According above paper,
crystal: LYSO(3.95 x 5.3 x 25 mm)
16 x 9 crystals/detector block
34 module (4 detector blocks/module)
Detector diameter: 74.4 cm
3~5 ringの装置があるようですが間をとって4ringにしました。
There are several types of Discovery MI with 3~5 rings, I selected 4 rings type.
それではGATEを操作していきます。Virtual Boxを起動します。
Let’s start. Please run the “Virtual Box”.
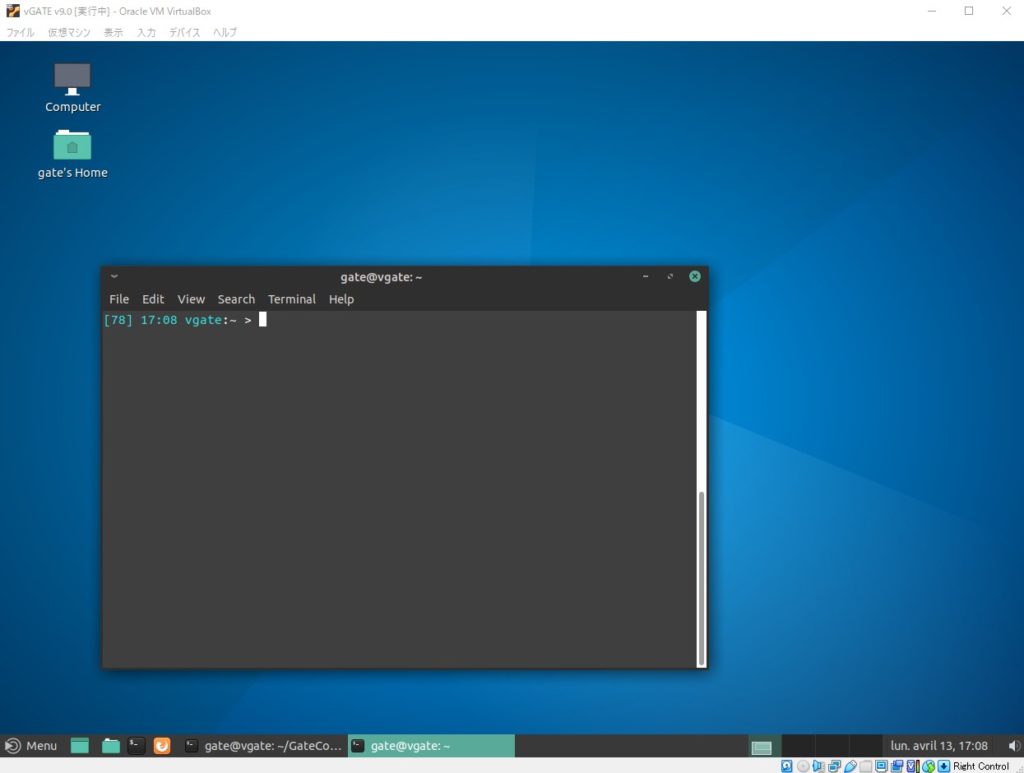
Terminalを起動します
Run the Terminal (right click -> Terminal).
# Terminal
vgate:~/Desktop > cd /home/gate/GateContrib/imaging/
cdコマンドでimagingフォルダの中まで行きましょう。
Let’s go to the “imaging” directory by using “cd” command.
オリジナルのサンプルコード(PET)は残しておいて、コピー(myPET)を作成します。
You make “myPET” directory by making a copy of the “PET” directory because you should leave original code for emergencies.
# imaging directory
vgate:~/GateContrib/imaging > cp -r PET myPET
「cp XXX YYY」で XXXをYYYという名前にしてコピーします。フォルダごとコピーする場合は「-r」オプションを付けます。
“cp XXX YYY” command can make a copy of XXX (new one name is YYY). If you want to copy the directory, please add “-r” option.
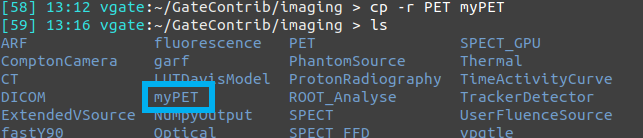
lsコマンドを打つと、myPETフォルダーができているのが分かります。
“myPET” directory is generated. You can confirm by “ls” command.
vgate:~/GateContrib/imaging > cd myPET/cdコマンドでmyPETフォルダーに入ります。今回はここで作業します。
Let’s go into the “myPET” directory. We work here this time.
通常はマクロファイルを編集すると思いますが、今回は対話的にPET装置を構築していきたいと思います。
Originally, GATE user edit macro file, but we try to make the PET device interactively this time because it helps us to understand.
vgate:~/GateContrib/imaging/myPET > GateGateを実行します。
Run the GATE.
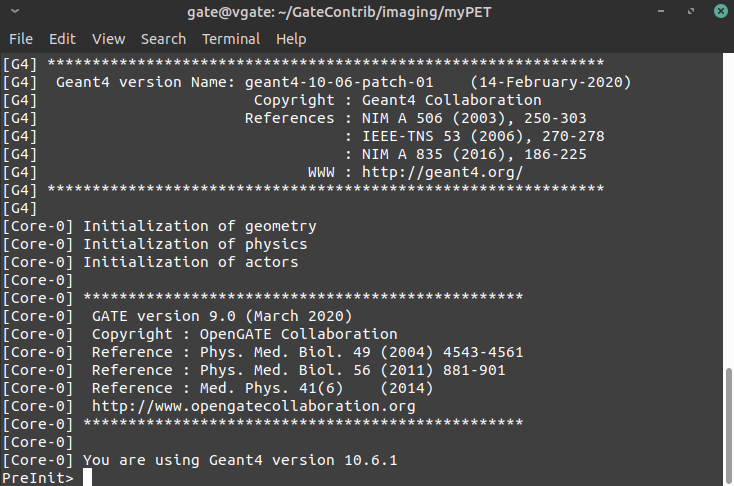
実行するとPreInit>と表示され、コマンドを待っている状態になります。
When you run the GATE, system is in the wait state (PreInit means Pre-Initialize).
可視化の設定
Setting of the visualization
#可視化に関する情報
/vis/open    OGLSX
/vis/viewer/set/viewpointThetaPhi    60 60
/vis/viewer/zoom    6.0
/vis/drawVolume
/tracking/storeTrajectory     1
/vis/scene/add/trajectories
/vis/scene/endOfEventAction    accumulate

#情報のアウトプットに関するマクロを読み込んでいる
/control/execute     Verbose.mac
このコマンドをTerminalにコピー&ペーストします。
Please copy and paste these commands to terminal.
先ほどのコマンドによってウィンドウが立ち上がりました。まだ何も構築していないので真っ暗です。
Owing to above commands, blank window is opened. Any structure is not appear because you still haven’t made that.
ジオメトリの作成
Construction of the geometry
/gate/geometry/setMaterialDatabase ../../misc/GateMaterials.db次は物質情報が記載されているファイルの場所を教えています。そのままコピペしてください。画面に変化はありません。
This command set the file (material information) to GATE. Please copy & paste it to terminal.
#
#     W O R L D
#
/gate/world/geometry/setXLength       400. cm
/gate/world/geometry/setYLength       400. cm
/gate/world/geometry/setZLength       400. cm
次はWorldに関する情報を入力します。それぞれ4mの立方体とします。シミュレーションはWorldの中でだけ、実行されます。これから構築する装置やファントムを全て含むことができる大きさにしてください。
Next, you input the information about “World”. Each side is a 4 meter cube this time. Calculation of the Monte Carlo is performed inside of the “world”. Thus, you have to make the big world enough to include all other geometry.
#以降はコメントアウト(無視される)よ
“#” means comment-out. Text after “#” is ignored.
#	CYLINDRICAL
/gate/world/daughters/name    cylindricalPET
/gate/world/daughters/insert    cylinder
/gate/cylindricalPET/placement/setTranslation  0.0 0.0 0.0 cm
/gate/cylindricalPET/geometry/setRmax           400.0 mm
/gate/cylindricalPET/geometry/setRmin           372.0 mm
/gate/cylindricalPET/geometry/setHeight         200.0 mm
/gate/cylindricalPET/setMaterial       Air
/gate/cylindricalPET/vis/forceWireframe
/gate/cylindricalPET/vis/setColor     white

#可視化して確認
/gate/geometry/rebuild
PETの入れものを作ります。親Volumeはworldです。親Volumeからはみ出してはいけません。
入力が終わりましたら、とりあえずここまでの結果を確認するため
/gate/geometry/rebuildと入力します。
Make the container of the PET device. Mother volume of that container is “world”. Please remember that daughter volume must not stick out from mother volume. “/gate/geometry/rebuild” command can confirm the result so far.
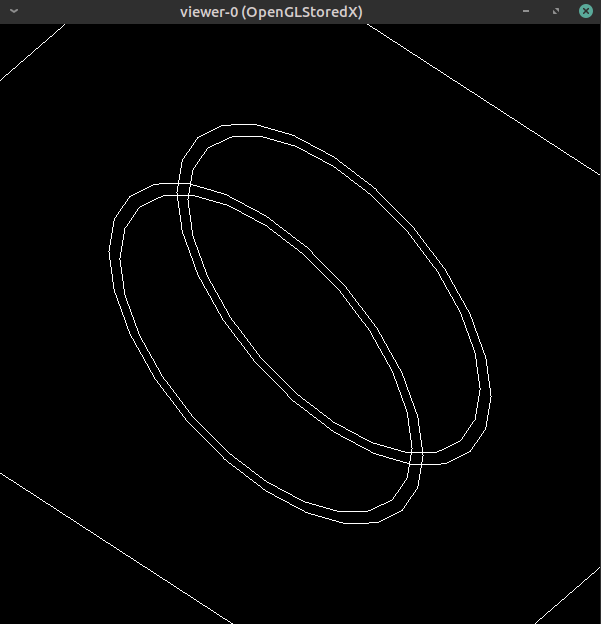
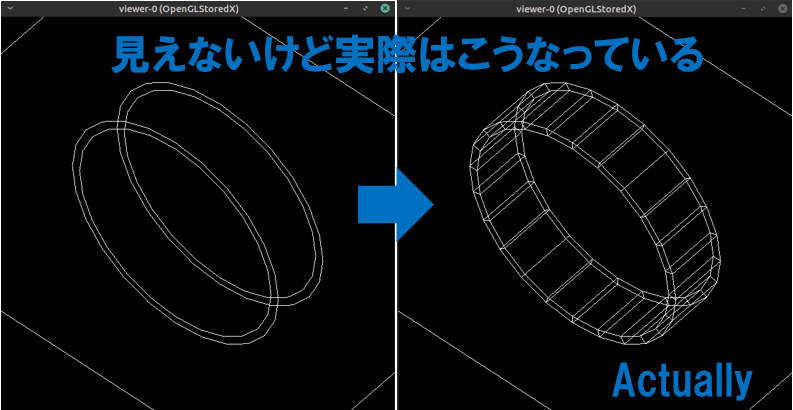
可視化の設定の都合で見えませんが、実際はちゃんとドーナツ状になっています。
Constructed geometry is not presented correctly because of the visualization setting, but it is OK. (Please see the below image)
#	HEAD
/gate/cylindricalPET/daughters/name    detector_blocks
/gate/cylindricalPET/daughters/insert    box
/gate/detector_blocks/placement/setTranslation  384.5 0.0 0.0 mm
/gate/detector_blocks/geometry/setXLength       25.0 mm
/gate/detector_blocks/geometry/setYLength       63.2 mm
/gate/detector_blocks/geometry/setZLength       200.0 mm
/gate/detector_blocks/setMaterial      Air
/gate/detector_blocks/vis/setVisible     1

#可視化して確認
/gate/geometry/rebuild
では次は、Moduleを追加していきます。名前はdetector_blocksにしました。名前は任意です。親Volumeは先ほど作ったcylindricalPETです。
Next, we add the module. I named the module “detector_blocks”. The name can be arbitrarily changed by the user. “cylindricalPET” is mother volume this time.
モジュール(detector_blocks)ができました。これが34個並んで円になります。
The “detector_blocks” is generated. Thirty-four module will be arranged in a circle finally.
#	BLOCK
/gate/detector_blocks/daughters/name    block
/gate/detector_blocks/daughters/insert    box
/gate/block/placement/setTranslation      0.0 0.0 0.0 cm
/gate/block/geometry/setXLength       25.0 mm
/gate/block/geometry/setYLength       63.2 mm
/gate/block/geometry/setZLength       47.7 mm
/gate/block/setMaterial      Air
/gate/block/vis/setVisible      1

#可視化による確認
/gate/geometry/rebuild
このコマンドをコピー&ペーストしてください。
Please copy & paste this command to terminal.
detector_blockが追加されました。これが体軸方向に4つ並びます。これも親Volumeのdetector_blocksからはみ出してはいけません。完全に重なるのはOKです。
The “detector_block” is placed inside of “detector_blocks”. It’s OK that daughter volume and mother volume overlap completely.
Four “detector_block” will be arranged along the Z direction.
#	C R Y S T A L
/gate/block/daughters/name     crystal
/gate/block/daughters/insert     box
/gate/crystal/placement/setTranslation      0.0 0.0 0.0 cm
/gate/crystal/geometry/setXLength    25 mm
/gate/crystal/geometry/setYLength    3.95 mm
/gate/crystal/geometry/setZLength    5.3 mm
/gate/crystal/setMaterial     LSO
/gate/crystal/vis/setVisible      1

#可視化して確認
/gate/geometry/rebuild
このコマンドをコピー&ペーストしてください。
Please copy & paste this command to terminal.
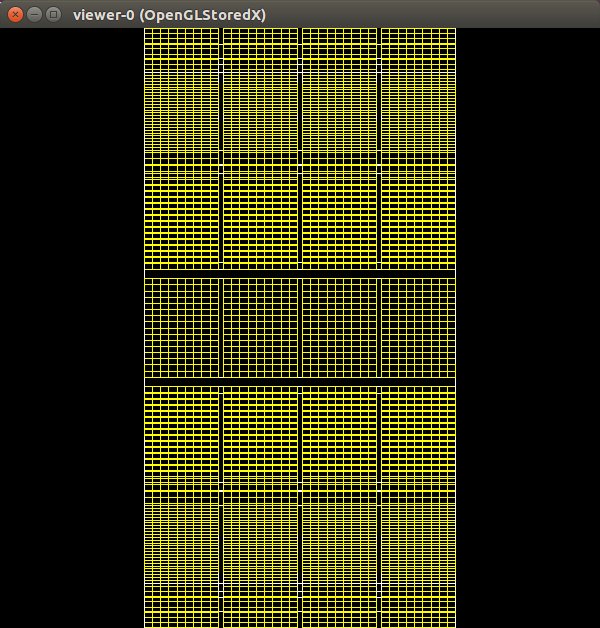
クリスタルがblockに配置されました。黄色い小さいやつです。これが、16 x 9個並びます。
Crystals are placed inside of the “detector_block”. It is small volume with yellow color. Crystals will be arranged like a array finally (16 x 9).
ちょっと方向を変え、3倍に拡大します。
Let’s change direction, and magnifies objects by 3 times.
/vis/viewer/set/viewpointThetaPhi 90 0
/vis/viewer/zoom 3
このコマンドをコピー&ペーストしてください。
Please copy & paste this command to terminal.
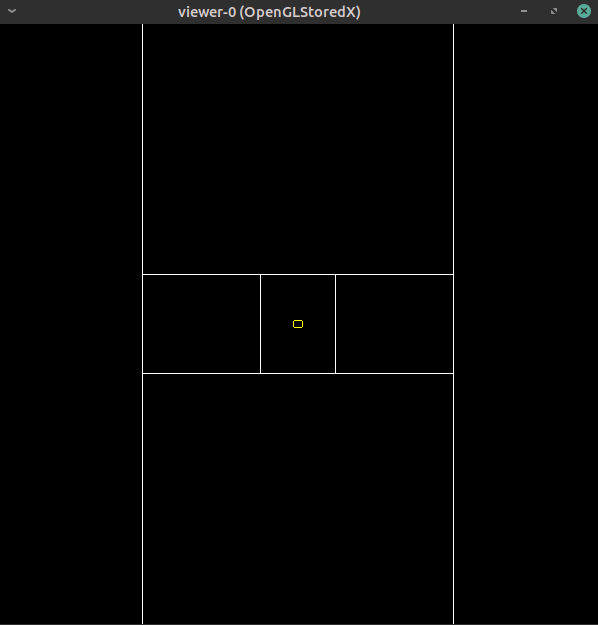
ガントリーを横からみた図です。
This is side view of the PET gantry.
#	R E P E A T    C R Y S T A L
/gate/crystal/repeaters/insert       cubicArray
/gate/crystal/cubicArray/setRepeatNumberX     1
/gate/crystal/cubicArray/setRepeatNumberY     16
/gate/crystal/cubicArray/setRepeatNumberZ     9
/gate/crystal/cubicArray/setRepeatVector         0.0 3.95 5.3 mm

#可視化による確認
/gate/geometry/rebuild
このコマンドをコピー&ペーストしてください。
Please copy & paste this command to terminal.
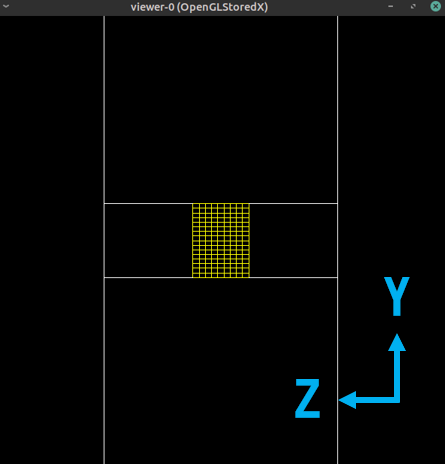
クリスタルが繰り返し配置されました。元の1個を中心座標として
X方向: 0.0 mm
Y方向: 3.95 mm
Z方向: 5.3 mm
ずらして配置しています。今回は隙間なく並べているので、クリスタルの大きさと同じにしています。
Crystals are arranged repeatedly with central coordinate of original crystal at the center. Crystals is placed at intervals of x:0.0mm, y:3.95mm, z:5.3mm. I arrange crystals without gaps, so gap and crystal size is same.
#	R E P E A T    BLOCK
/gate/block/repeaters/insert      cubicArray
/gate/block/cubicArray/setRepeatNumberX       1
/gate/block/cubicArray/setRepeatNumberY       1
/gate/block/cubicArray/setRepeatNumberZ       4
/gate/block/cubicArray/setRepeatVector        0.0 0.0 50.76 mm
このコマンドをコピー&ペーストしてください。
Please copy & paste this command to terminal.

detector_blockが繰り返し4つ配置されました。元の1個を中心座標として
X方向: 0.0 mm
Y方向: 0.0 mm
Z方向: 50.76 mm
ずらして配置しています。体軸方向に並べているのでXYは0.0mmです。
The “detector_block” are arranged repeatedly with central coordinate of original “detector_block” at the center. That is placed at intervals of x:0.0mm, y:0.0mm, z:50.36mm along the Z direction.
#	R E P E A T HEAD
/gate/detector_blocks/repeaters/insert                         ring
/gate/detector_blocks/ring/setRepeatNumber               34
円形にdetector_blocksを34個並べます。
Thirty-four detector_blocks are arranged in a circle.
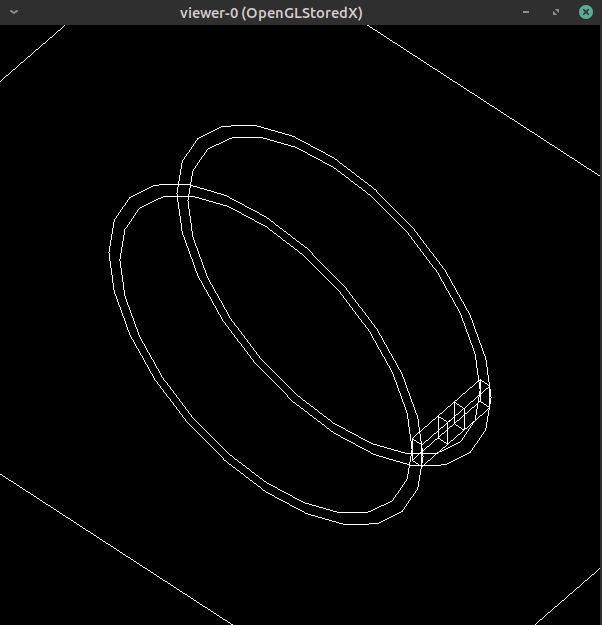
並びました。重なって見難いので方向を変えます。
OK. Let’s turn the direction because it hard see the volume.
/vis/viewer/set/viewpointThetaPhi  60 40
/vis/viewer/zoom 0.3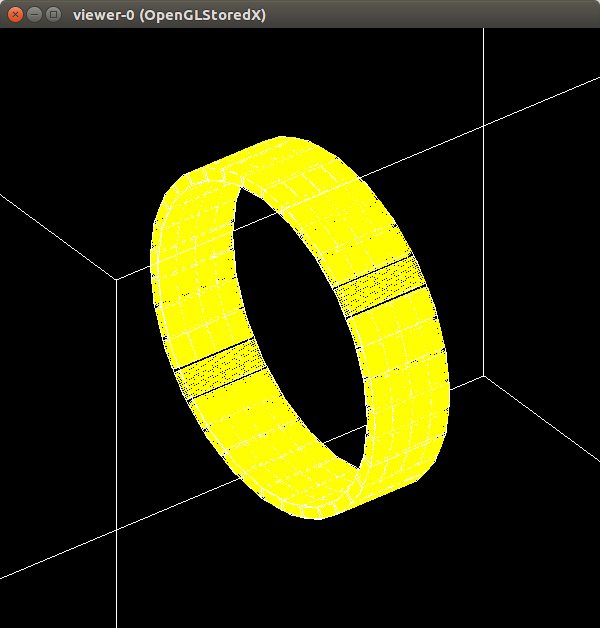
PETらしくなりました。
It looks like a PET.
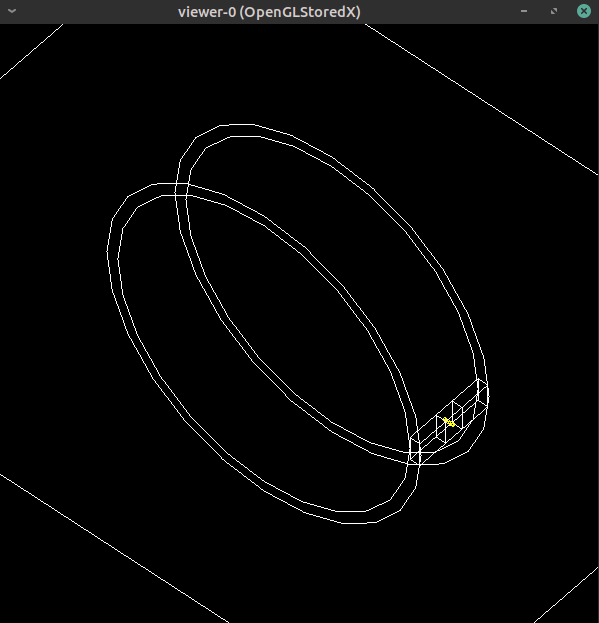
/gate/systems/cylindricalPET/describeこれまで作成してきたものを一覧にして出力します
This command shows all volume which we constructed until now.
被写体を作ろうと思います。直径20cmで長さ20cmの円柱の水ファントムを作成します。
I make a cylindrical water phantom (diameter: 20cm, length: 20cm).
#=======================
#  P H A N T O M
#=======================
/gate/world/daughters/name              phantom
/gate/world/daughters/insert              cylinder
/gate/phantom/setMaterial                 Water
/gate/phantom/vis/forceSolid
/gate/phantom/vis/setColor                green
/gate/phantom/geometry/setRmax     10.0 cm
/gate/phantom/geometry/setHeight    20.0 cm
このコマンドをコピー&ペーストしてください。
Please copy & paste this command to terminal.
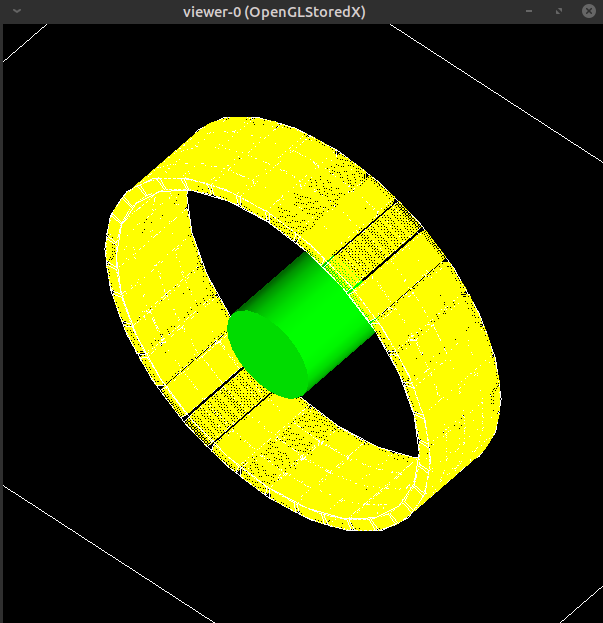
/gate/phantom/vis/forceSolid ではなく
/gate/phantom/vis/forceWireframe を使用すると内側が透けて見えます。
If you input “/gate/phantom/vis/forceWireframe” instead of “/gate/phantom/vis/forceSolid”, you can see inside of the phantom.
各VolumeをPET装置に取り付ける
Attach volume to the PET device
#	A T T A C H    S Y S T E M
/gate/systems/cylindricalPET/rsector/attach     detector_blocks
/gate/systems/cylindricalPET/module/attach    block
/gate/systems/cylindricalPET/crystal/attach crystalそれぞれ、部位をattachします。公式のマニュアルによるとcylindricalPETのサンプルコードは5つの構成を登録するようです。今回はsubmoduleとlayerに該当するものが無いためattachしていません。
You attach the volume to PET device. According to official manual, cylindricalPET is constructed five components. I did not make “submodule” and “layer”.
| depth | ||
| cylindricalPET | resctor | 1 |
| module | 2 | |
| submodule | 3 | |
| crystal | 4 | |
| layer[0~3] | 5 |
情報を出力する際にdepthを指定します。
By specifying the depth, you can decide the source of information.
# ATTACH CRYSTAL  SD
/gate/crystal/attachCrystalSD

# ATTACH PHANTOM SD
/gate/phantom/attachPhantomSD
crystal SD(sensitive detector)にcrystalを登録します。これによってcrystalが有感検出器となり放射線が入射した際に様々な情報を記録できます。
また、phantom SDにphantomを登録します。crystal SDとは違った情報が取得されます。
You register the crystal to SD (sensitive detector). By doing so, crystal act as a detector which can get many information. You also register phantom to “phantomSD”. It can get information which is different “crystalSD” ones.
ここまででジオメトリに関することは終わりです。次は物理モデルに関してコマンドを打っていきます。
Construction of the geometry is finished. Next, you put the command to set a “physics”.
物理モデル
Physics
#=================================
# PHYSICS
#=================================

/gate/physics/addProcess PhotoElectric
/gate/physics/processes/PhotoElectric/setModel StandardModel

/gate/physics/addProcess Compton
/gate/physics/processes/Compton/setModel StandardModel

/gate/physics/addProcess RayleighScattering
/gate/physics/processes/RayleighScattering/setModel PenelopeModel

/gate/physics/addProcess ElectronIonisation
/gate/physics/processes/ElectronIonisation/setModel StandardModel e-
/gate/physics/processes/ElectronIonisation/setModel StandardModel e+

/gate/physics/addProcess Bremsstrahlung
/gate/physics/processes/Bremsstrahlung/setModel StandardModel e-
/gate/physics/processes/Bremsstrahlung/setModel StandardModel e+

/gate/physics/addProcess PositronAnnihilation

/gate/physics/addProcess eMultipleScattering e+
/gate/physics/addProcess eMultipleScattering e-相互作用の物理モデルを登録します。使用するエネルギーに応じて変える必要があります。サンプルコードはMultipleScatteringとなっていますが、eMultipleScatteringに変わったようです。とりあえず、このままコピペします。
You register about interaction. You need to select proper physics model according to the radiation energy. MultipleScattering is used in sample code, but it has changed to eMultipleScattering in according to this site.
/gate/physics/processList Enabled物理プロセスを有効化するのでしょうか?よくわかりませんがこのコマンドを打ちます。
This command set physics to system, please put it.
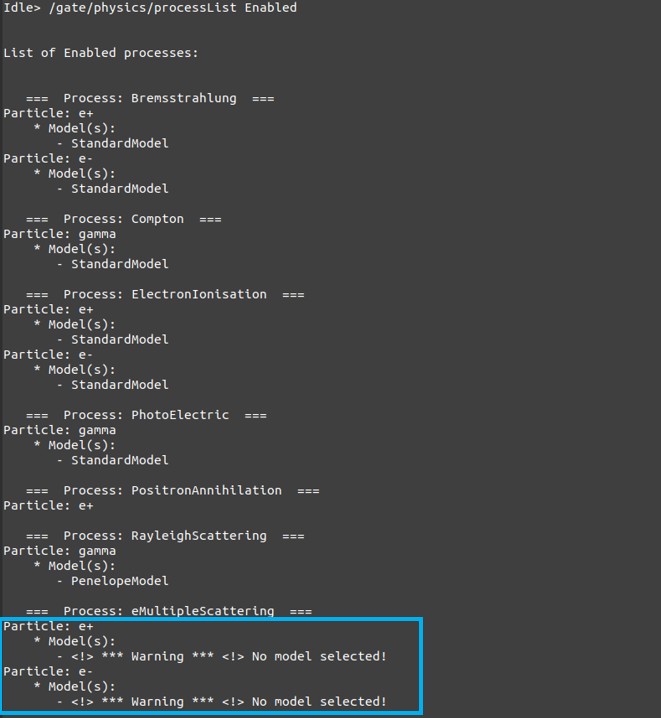
何か警告(Warning)がでました、、、、が
I have some warning… but
これも気にする必要なさそうです。
It is OK.
/gate/physics/processList Initialized初期化します。
Let’s initialize.
#============================
# CUTS
#============================
/gate/physics/Gamma/SetCutInRegion    crystal 1.0 cm
/gate/physics/Electron/SetCutInRegion   crystal 1.0 cm
/gate/physics/Positron/SetCutInRegion   crystal 1.0 cm
次はCUTです。シミュレーションを現実的な時間で終わらせるためには、必要のない低エネルギーの粒子の挙動は追わないようにする必要があります。どれくらいがいいかはよく分からないです。実際にデータを取得する際にはいくつか値を変えてみて自分の得たい結果に影響するか確認したらよいと思います。
You put the command about “CUT” of the calculation. To finish the simulation in a realistic time, compromise of the calculation is unavoidable. The optimum cut length depends on the calculation conditions. You should decide the CUT length while checking the result.
#===============================
# INITIALISATION
#===============================
/gate/run/initialize
これで事前準備が終わりです。ちなみに線源に関するコマンドは
/gate/run/initializeの後に打たなければならないなどルールがあるので注意です。サンプルコードに従っていれば、大丈夫だと思います。
Advance preparations is finished. By the way, the command regarding the radiation source must be entered after /gate/run/initialize. Thus, you write macro file in accordance with sample code.
情報の読み出し
Readout
#=========================================
#   D I G I T I Z E R: DETECTOR ELECTRONIC RESPONSE
#=========================================
/gate/digitizer/Singles/insert          adder
/gate/digitizer/Singles/insert        readout
/gate/digitizer/Singles/readout/setDepth      2

/gate/digitizer/Singles/insert         blurring
/gate/digitizer/Singles/blurring/setResolution       0.094
/gate/digitizer/Singles/blurring/setEnergyOfReference      511. keV

/gate/digitizer/Singles/insert      thresholder
/gate/digitizer/Singles/thresholder/setThreshold    425. keV
/gate/digitizer/Singles/insert     upholder
/gate/digitizer/Singles/upholder/setUphold      650. keV
次はdigitizerと呼ばれるセクションです。読み取りの深さは2(Module)でいいのだろうか?エネルギー分解能は9.4%, 同時計数のエネルギーウィンドウは425~650 keVとしました。
Next, digitizer section. Readout depth is 2 (Is it correct?).
Energy resolution set to 9.4%, energy window set to 425~650 keV.
#=====================================
#	C O I N C I D E N C E    S O R T E R
#=====================================
/gate/digitizer/Coincidences/setWindow    4.9 ns

/gate/digitizer/name        delay
/gate/digitizer/insert       coincidenceSorter
/gate/digitizer/delay/setWindow    10. ns
/gate/digitizer/delay/setOffset      500. ns
同時計数の時間幅や遅延回路のウィンドウ設定です。情報がないので分かりません。サンプルコード(PET_CylindricalPET_System.mac)のままとしました。
Setting of the coincidence (and delay) time window. I did not change it from sample code because I could not find out these information.
線源
Source
#==========================
#  P A R T I C L E   S O U R C E
#==========================
/gate/source/addSource               F18source
/gate/source/F18source/setActivity      1000000. becquerel
/gate/source/F18source/gps/particle        e+
/gate/source/F18source/setForcedUnstableFlag        true
/gate/source/F18source/setForcedHalfLife        6586 s
/gate/source/F18source/gps/energytype           Fluor18
/gate/source/F18source/gps/type           Volume
/gate/source/F18source/gps/shape        Cylinder
/gate/source/F18source/gps/radius         100 mm
/gate/source/F18source/gps/halfz           100. mm
/gate/source/F18source/gps/angtype         iso
/gate/source/F18source/gps/centre           0.0 0.0 0.0 cm

/gate/source/list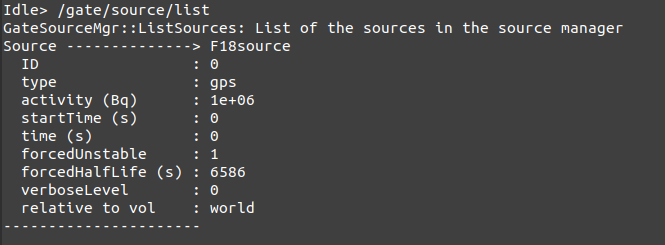
線源は18Fから放出される連続エネルギーの陽電子(e+)としました。線源の形は円柱形で半径10cm、長さ20cmとしました。
I use positron instead of the ion (18F). Positron energy obey the distribution of the 18F ones. The shape of the radiation source was cylindrical and had a radius of 10 cm and a length of 20 cm.
結果の出力
Output
#==============================
#  D A T A   O U T P U T
#==============================
/gate/output/root/enable
/gate/output/root/setFileName             YourFile
/gate/output/root/setRootHitFlag                  0
/gate/output/root/setRootSinglesFlag            1
/gate/output/root/setRootCoincidencesFlag    1
/gate/output/root/setRootdelayFlag              1
ROOT形式で結果を取得します。ファイル名はYourFile.rootとなります。Coincidences, Singles, Hitの情報を保存・出力できますが、データ容量が大きくなります。不要であれば0としてください。
We get result in ROOT format. File name is “YourFile.root”.
You can get coincidences, singles, hit, however the size of output data can be large. Please change flag from 1 to 0, if you don’t need.
乱数
Random number
#===================================
#  R A N D O M   E N G I N E  A N D  S E E D
#===================================
/gate/random/setEngineName      JamesRandom
/gate/random/setEngineSeed       default
/gate/random/verbose                 1
乱数の発生方法などを決めています。
/gate/random/setEngineSeed 123456789
のように種(seed)を与えて乱数を発生させると、毎回同じように放射線が出力します。同じ条件で計算したい場合にSeedを使用します。
This section decide how to generate the random number.
If you specify the random seed, you can simulate in the same situation.
取集時間
Acquisition time
#================================
#   M E A S U R E M E N T   S E T T I N G S
#================================
/gate/application/setTimeSlice    1 s
/gate/application/setTimeStart    0 s
/gate/application/setTimeStop    20 s
収集時間に関するコマンドです。収集時間は20sで、1sごとに区切られます。SPECTなどの場合はこのタイミングで検出器を動かします。
This section specify the acquisition time. In this case, total time is 20s. Calculation is done separated by 1s (SPECT head move in this timing in SPECT simulation).
実行
Run
/gate/application/startDAQこのコマンドを打つと計算が走ります。
You can run the simulation by this command.

/vis/disable

#/vis/open                                        OGLSX
#/vis/viewer/set/viewpointThetaPhi    60 60
#/vis/viewer/zoom                            6.0
#/vis/drawVolume
#/tracking/storeTrajectory                  1
#/vis/scene/add/trajectories
#/vis/scene/endOfEventAction            accumulate
計算する場合には可視化はOFFにします。一番最初の所ですね。
When you do a calculation, please turn off the visualization.
vgate:~/GateContrib/imaging/myPET > root YourFile.root 計算が終わったらmyPETフォルダの中にYourFile.rootができています。
root YourFile.root
で開きます。
The YourFile.root is generated in myPET directory when the calculation is finished. You can open it by “root YourFile.root” command.
Coincidences->Draw("sinogramTheta:sinogramS")ROOTが立ち上がり、上のようにコマンドを打つと
ROOT is started. If you put above command…
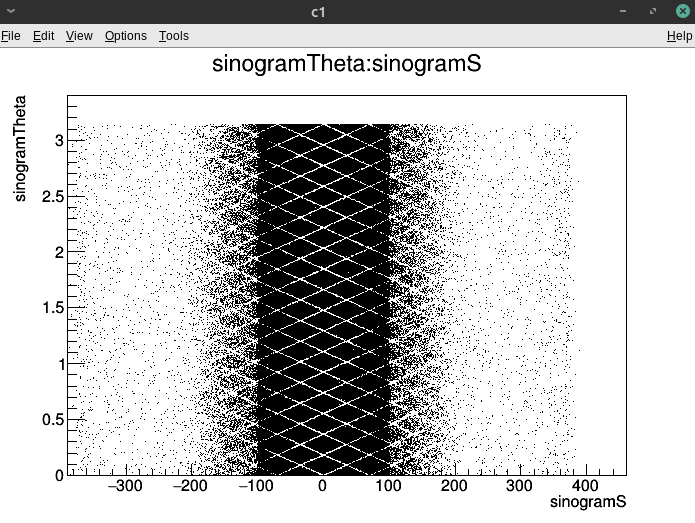
サイノグラムが表示されます。
you can see the sinogram.
構築したPET装置は短時間で作成したもので、間違いがあるかもしれません。(間違いがあったら教えてください。)
ただし、この記事で紹介したやり方はきっと役立つと思います。
This PET device may be wrong because I made it in a short time (I have not confirmed it).
However, this article is useful when you make your own device.
では、今日はこれまでにします。
I’m tired, bye.