
GATEの使い方 12 ~ecatのインストール~

How to use GATE 12

今回はecatをインストールをします。
This time.
GATEの出力形式にecat7があります。
GATE can output the calculation result in ecat7 format.
GATEの計算結果をecat7形式で出力することによりSTIRなどの再構成ソフトの入力として使用することができます。
The result output in ecat7 format can be used as the input of STIR (reconstruction software).
これを読めばecat7のインストールができ、ecat7形式で出力を得ることができるようになります!
If you read this article, you can install the ecat7 and get the results in ecat7 format.
GATEの使い方 12
How to use the GATE
GATEのマニュアルには以下のような記述があります。
The following is written in the GATE manual.
The LMF and ecat7 packages are also provided on the GATE website. They offer the possibility to have different output formats for your simulations. Note that this code is very old and not supported by the Gate collaboration, only provided “as is”. With newer compilers you may have to do some minor hacking (for ECAT you may need to add compiler flags to select the C90 standard, for instance).
https://opengate.readthedocs.io/en/latest/installation.html
ようするに、LMFやecat7はとても古いソフトでGATEはサポートしませんよ、ということらしいです。
In short, LMF and ecat7 are very old software and GATE does not support them.
もし使うならコンパイルが通るように、現在の書き方に変更する必要があり自分でやってね!ということらしいです。
If you use these software, you need to change the contents of the installation file so that the compilation will succeed. You have to do it yourself.
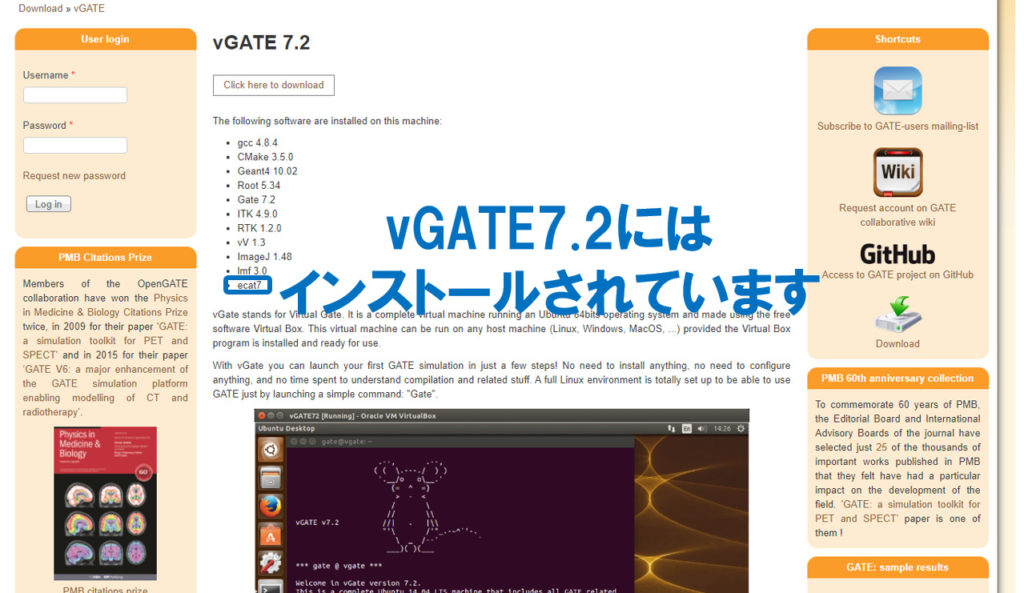
vGATE7.2にはecat7がインストールされていますが、それ以降のvGATEには入っていません。なので、ecat7形式で出力したい場合にはわざわざvGATE7.2に切り替えて使用しなければならないため、非常に手間です。
The vGATE7.2 has ecat7 installed, but later newer vGATE does not. So, if you want to output in ecat7 format, you have to switch to vGATE7.2 and use it, which is very troublesome.
今回は、このソフトウェアをvGATE8.2の環境でインストールします。
This time, install this software in the environment of vGATE8.2.
vGATEのダウンロード・起動 Download and run the vGATE
vGATE環境の準備はこちらの記事を参考にしてください。
Please refer to this article for the preparation of vGATE environment.
ecat7のインストール Installation of the ecat7
ecat7は開発元ではなく、GATEの公式HPからダウンロード可能です。
The ecat7 can be downloaded from the official website of GATE, not the developer.
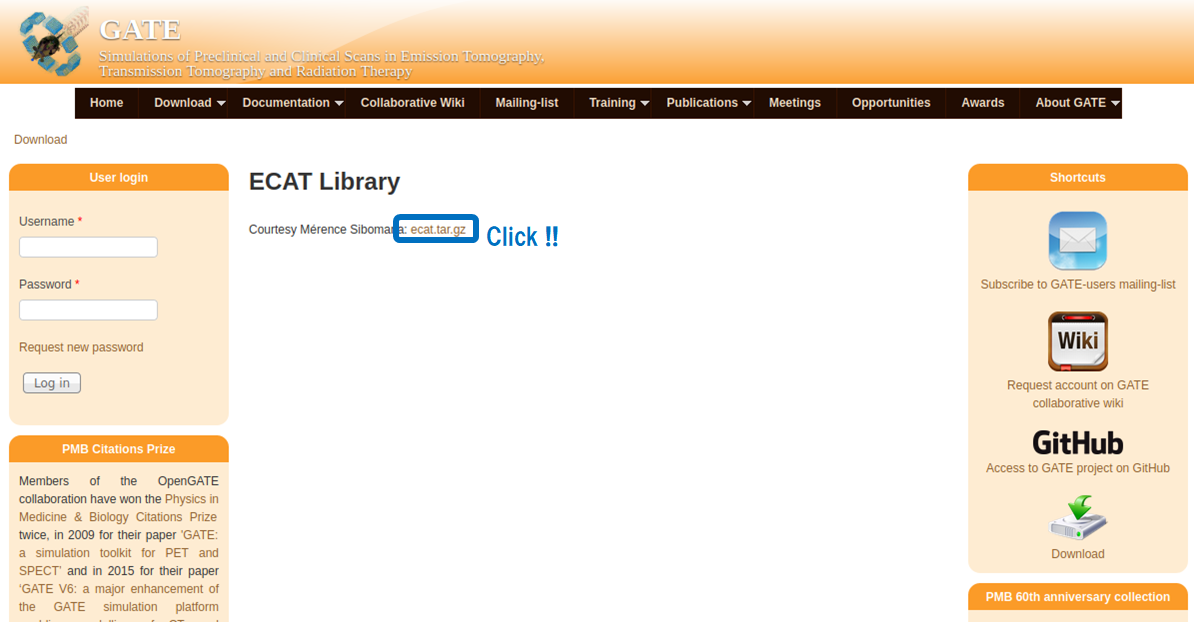
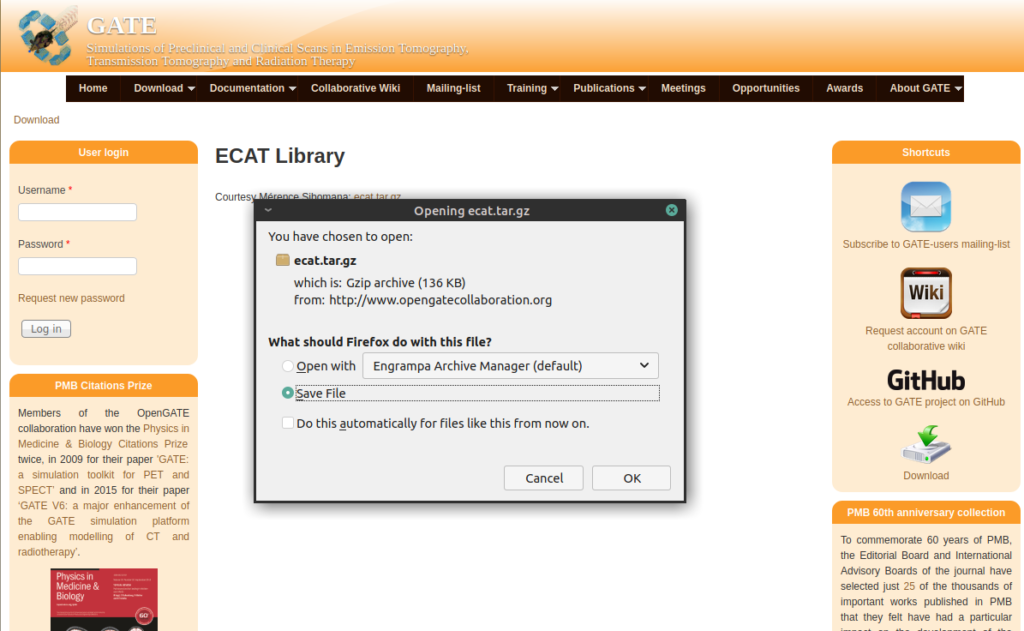
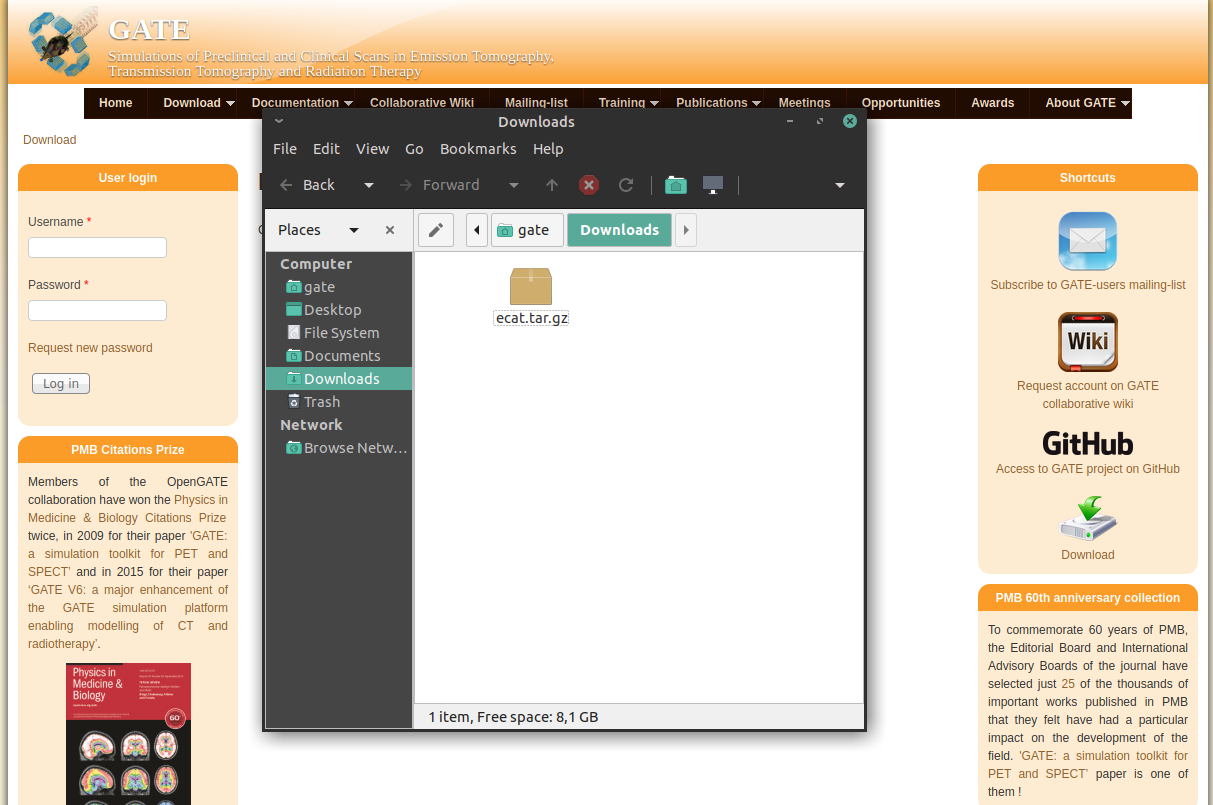
vGATE上でダウンロードしてください。保存先は「ダウンロード」とします。
Save to “Download”.
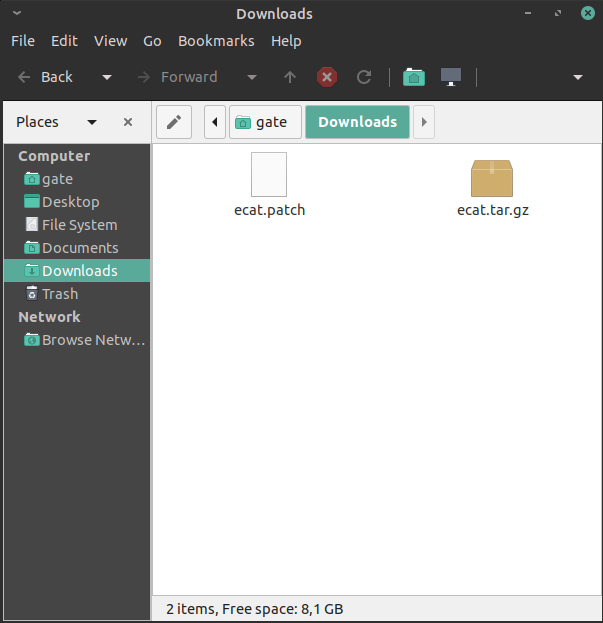
以下のzipファイルをダウンロードしてDownloadsフォルダに保存してください。unzipコマンドで解凍すると中からecat.patchというファイルが出てきます。
Download the zip file below and save it in the Downloads folder. If you unzip it with the unzip command, a file called ecat.patch will appear.
$ cd /home/gate/Downloads/
$ unzip ecat.zip
$ rm -rf ecat.zip
ダウンロードフォルダの中には以下の2つがある状態です。
At the moment, there are the following two files in the download folder.
$ mkdir /tmp/ecat
$ cd /tmp/ecat
$ tar zxf /home/gate/Downloads/ecat.tar.gz
コマンドの意味は上から順に
What the command means;
1.mkdirコマンドで/tmp/ディレクトリの中にecatという名前のディレクトリを作成する。
1. Create a directory named ecat in the /tmp/ directory with the mkdir command.
2. cdコマンドでそこ(/tmp/ecat)に移動する。
2. Use the “cd” command to move to /tmp/ecat.
3. tarコマンド(zxfオプション)でecat.tar.gzを解凍する。
3. Extract ecat.tar.gz with the tar command (with zxf option).
現時点でこの状態です。
Check the current status.
$ ls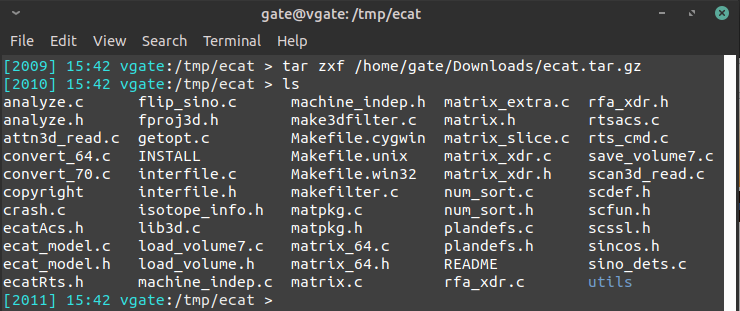
では、次に進みます。
Let’s go ahead.
$ patch -p1 < /home/gate/Downloads/ecat.patchダウンロードしたパッチを当てる。
Apply the downloaded patch.
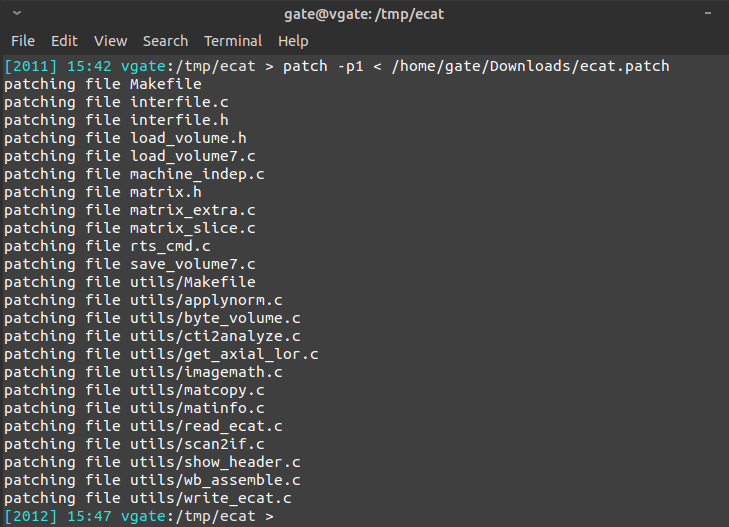
こんな感じの表示になります。
You can see above a display.
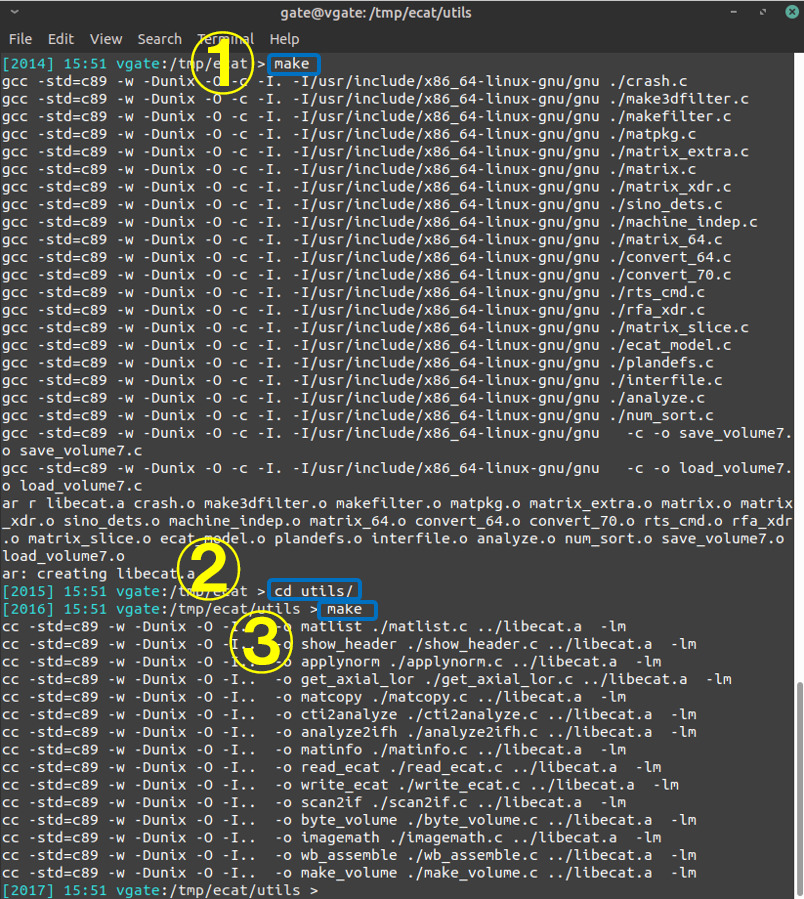
$ make
$ cd utils
$ make
後は、コンパイルします。
Next, we will compile ecat7.
1. makeする
1. make
2. /tmp/ecat/utilsディレクトリに移動する
2. Move to /tmp/ecat/utils
3. 再びmakeする
3. make again.
次に、ヘッダーファイル(xxx.h)とlibecat.aファイルを移動させます。
Next, move the header file (xxx.h) and libecat.a file.
$ cd ../
$ mkdir include
$ cp *.h include/
$ mkdir lib
$ cp libecat.a lib/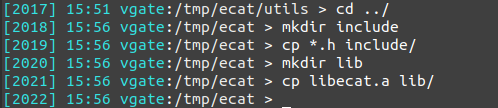
これでecat7のインストールは終わりです。
This completes the installation of ecat7.
GATEのcmake
ecatをGATEで使用するためには、コンパイルの段階でecat7のオプションをONにしなければなりません。
In order to use ecat with GATE, the option of ecat7 must be turned ON at the compilation stage.
なので、GATEのcmakeをし直します。
So, redo cmake of GATE.
vGATEはどこにインストールされているのでしょうか?確認してみます。
Where is vGATE installed? I will check it.
$ which Gate
/usr/share/gate/Gate-install/bin/Gateにあるようです。
Gate is installed in /usr/share/gate/Gate-install/bin/Gate
とりあえず/usr/share/gateまで移動します。
Go to /usr/share/gate.
$ cd /usr/share/gate/
Linuxでソフトをインストールするさいのお決まり?だと思うのですが、ファイルがごちゃごちゃにならないようにフォルダを分けてインストールします。(私も素人なので間違って理解しているかも)
A rule for installing software on Linux? I think it is, but install it by dividing the folder so that the files do not clutter. (I’m an amateur too, so maybe I understand it wrongly)
インストールする際にGate-buildとGate-installディレクトリを作成します。
Create Gate-build and Gate-install directories during installation.
元のファイルはGateですが、インストールの作業はGate-buildディレクトリの中で行います。最後のmake installでGate-installディレクトリの中に実行ファイルが作成されます。
The original file is Gate, but the installation work is done in the Gate-build directory. The final make install will create an executable in the Gate-install directory.
とりあえずGate-buildディレクトリの中に移動します。
Move to the Gate-build directory.
$ cd Gate-buildcmake用のファイルはGateに入ってるので../Gateとします。
作業が簡単なのでccmakeを使います。
Since the file for cmake is in Gate (../Gate) .
I use ccmake because it is easy.
$ sudo su
パスワードは「virtual」です。
Password is “virtual”.
では、やっとcmakeです。
Let’s cmake.
# ccmake ../Gate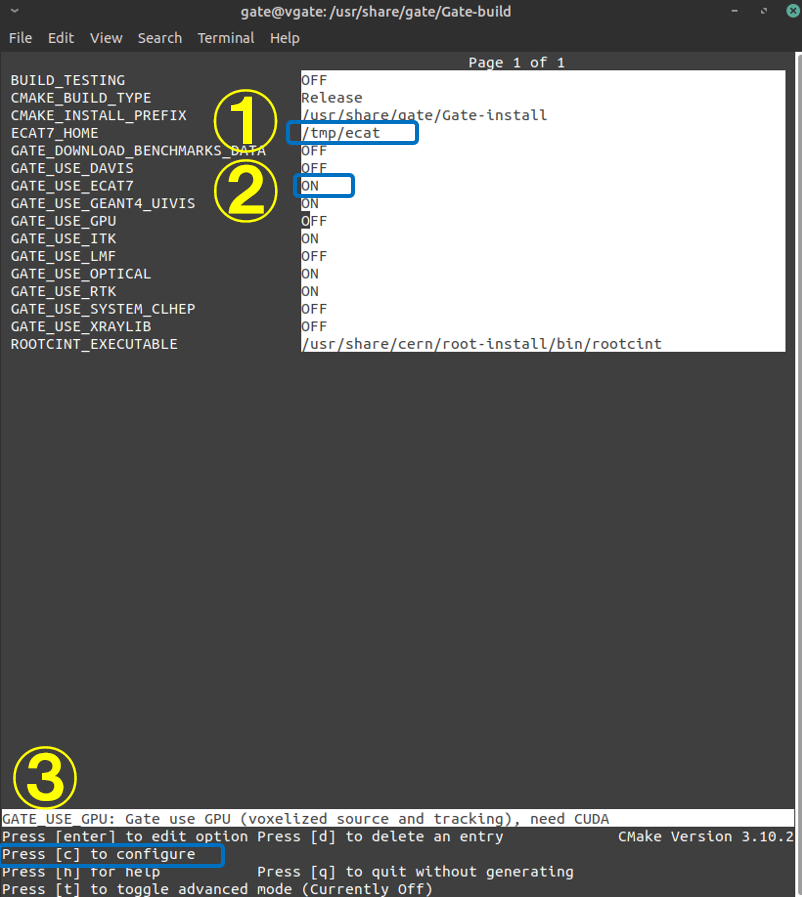
ECAT7_HOMEにインストール先のディレクトリパスを入力します。
GATE_USE_ECAT7をONにします。
Enter the installation directory path in ECAT7_HOME.
Turn on GATE_USE_ECAT7.
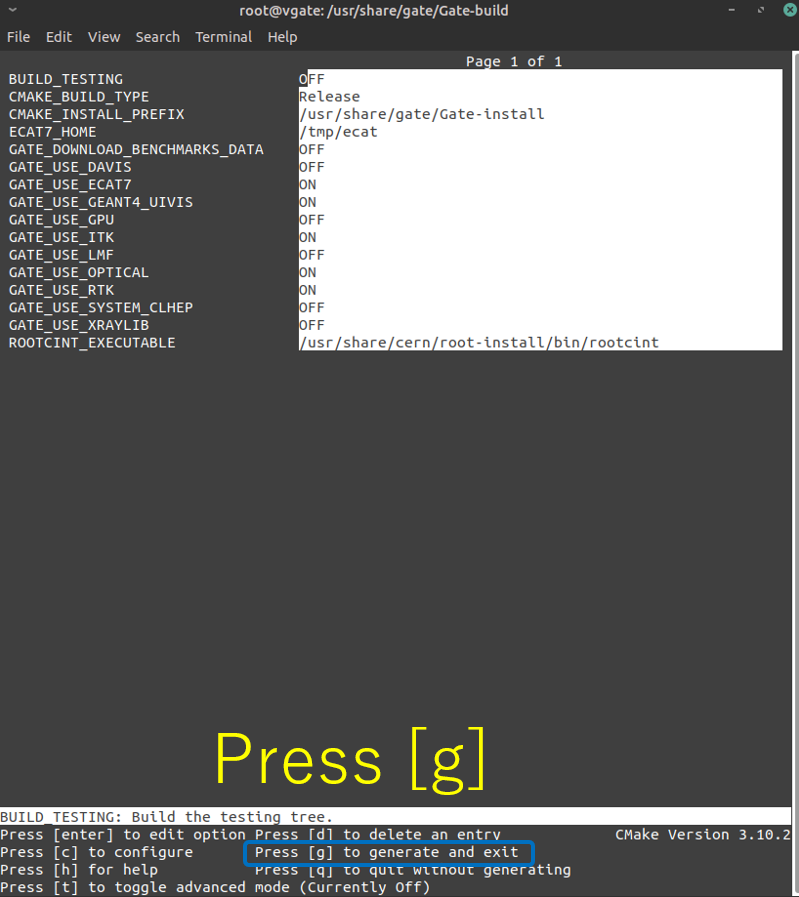
設定が終わりましたら「c」を押してconfigureします。
Push the “c” key to configure.
このような表示が出ればOKです。「e」を押して画面を終了します。
It is OK if such a display appears. Press “e” to exit the screen.
次に、「g」を押します。
Next, enter the “g” key.
cmakeが終わったので、makeします。
The cmake is finished. Let’s make.
# makemakeが終わったら、make installします。
After make is done, make install.
# make installこれで作業は全て完了です。管理者から一般ユーザーに戻りましょう。
This is all the work. Let’s go back from the administrator to the general user.
# exitサンプルコードの実行 Run the sample code
ecat7形式で出力できるようになったのか、確認するためにサンプルコードを実行します。
Run the sample code to see if you can now output in ecat7 format.
移動します。
Move
$ cd /home/gate/GateContrib/imaging/PET/
PET_Ecat_System.macがecat7形式で結果を出力するサンプルコードです。中身を確認してみましょう。
PET_Ecat_System.mac is the sample code that outputs the result in ecat7 format. Let’s check the contents.
$ gedit PET_Ecat_System.mac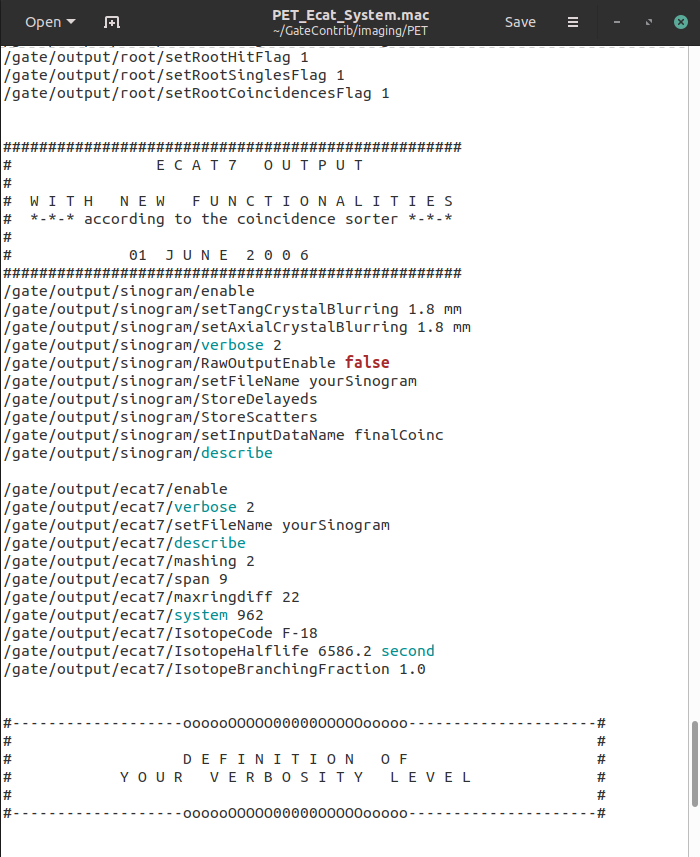
たしかにoutputはsinogram形式とecat7形式で出力されるようになっています。
Certainly, output is designed to be output in sinogram format and ecat7 format.
PET_Ecat_System.macを実行します。
Run the PET_Ecat_System.mac
$ Gate PET_Ecat_System.mac問題なく終わりました。
It ended without any problems.
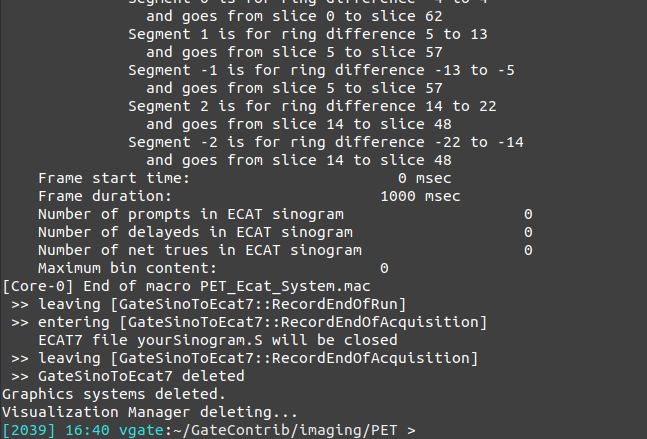
$ lsecat形式で出力されたことが確認できました。
The result was output in ecat format.

Ecat形式のファイルを使って再構成する方法はまた今度説明します
How to reconstruct using Ecat format file will be explained in future.